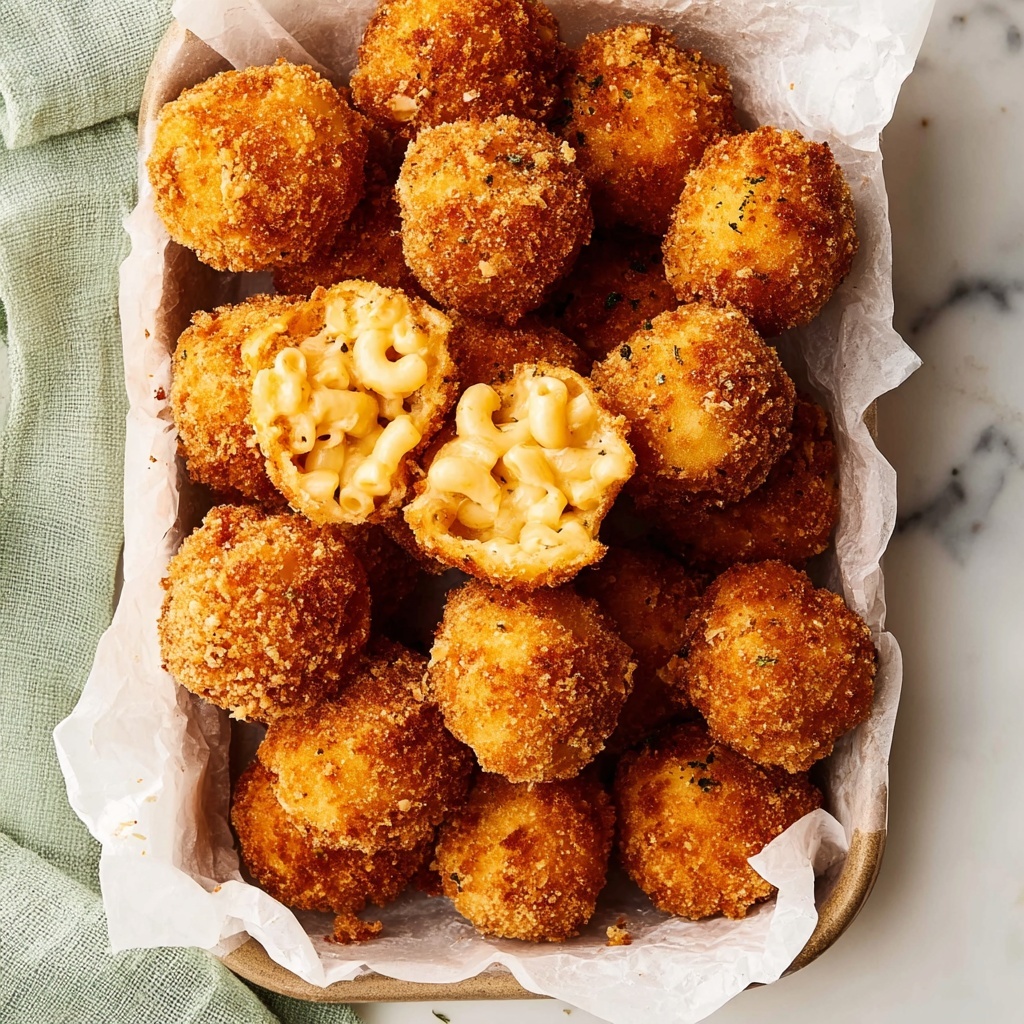
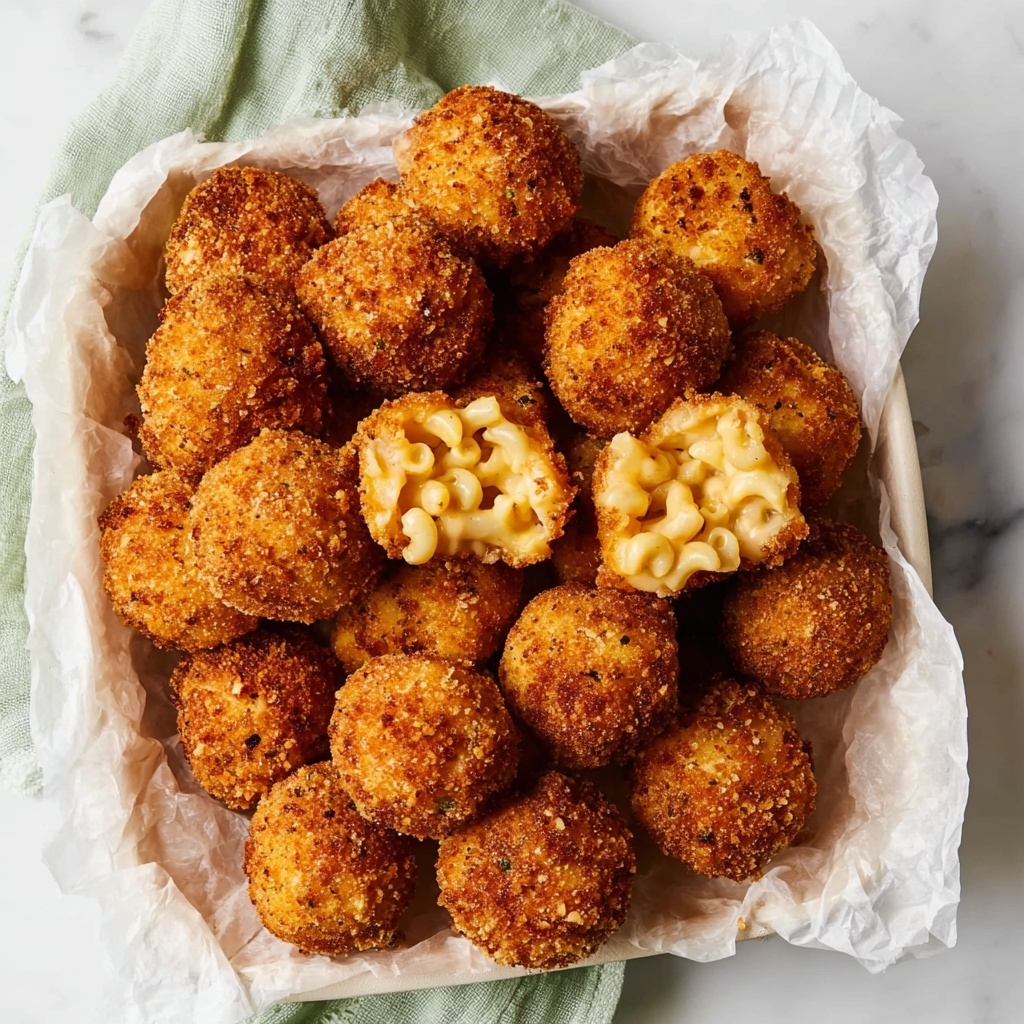
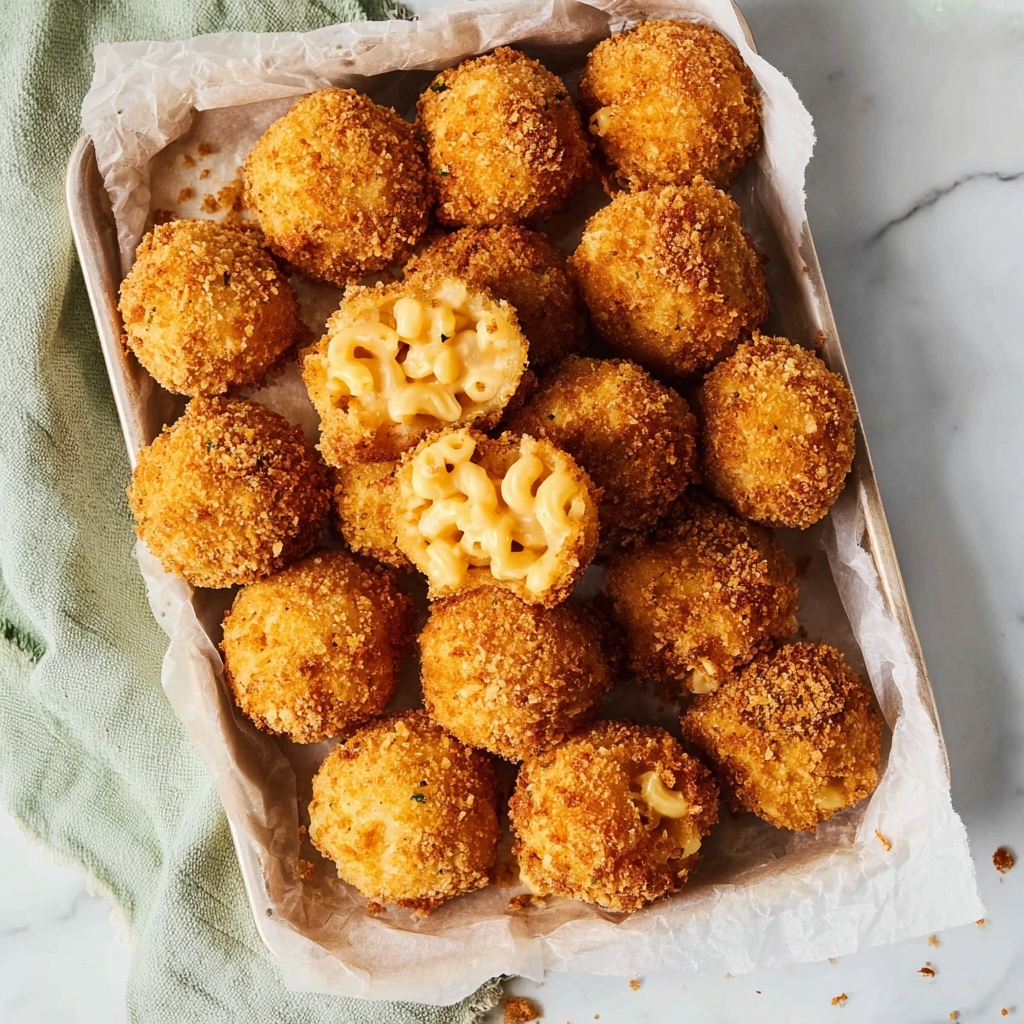
If you are searching for a crowd-pleasing comfort food with a crispy golden exterior and irresistibly gooey inside, this Fried Mac and Cheese Balls Recipe is an absolute must-try. Combining creamy, cheesy macaroni with a perfectly crunchy breadcrumb shell, these bite-sized delights bring a fun twist to traditional mac and cheese. Every step, from the cheesy sauce to the crisp frying, results in a snack or appetizer that’s packed with flavor and texture, making it the perfect indulgence for parties, game days, or cozy nights in.
Ingredients You’ll Need
This recipe relies on straightforward, wholesome ingredients that each play an essential role in creating the perfect Fried Mac and Cheese Balls. From the smooth cheeses that add richness to the crispy panko that seals in all that creamy goodness, every element counts.
- 16 ounces dry elbow macaroni: Classic pasta shape that holds cheese sauce beautifully.
- 2 tablespoons unsalted butter: Melts into the roux and adds luscious creaminess.
- 2 tablespoons all-purpose flour: Thickens the cheese sauce to a perfect consistency.
- ½-1 teaspoon ground cayenne pepper: Adds a subtle kick without overpowering the cheese.
- 1 teaspoon garlic powder: Boosts savory depth and flavor complexity.
- 1 teaspoon onion powder: Balances the garlic with mild sweetness.
- ½ teaspoon kosher salt: Enhances all the savory flavors.
- ½ teaspoon ground black pepper: Gives a faint warmth to every bite.
- 2 cups milk: Creates a creamy base for the cheese sauce.
- 4 ounces cheddar cheese (freshly shredded): Sharp and tangy, the backbone of flavor.
- 4 ounces mozzarella cheese (freshly shredded): Melts beautifully for stretch and silkiness.
- Vegetable oil (for frying): Provides a neutral frying medium to crisp the outer shell.
- 2 large eggs: Helps the breadcrumb coating stick perfectly to each ball.
- ¼ cup water: Mixed with eggs for a smooth coating dip.
- 2½ cups Panko breadcrumbs: Creates the irresistibly crunchy crust.
How to Make Fried Mac and Cheese Balls Recipe
Step 1: Cook the Pasta
Start by bringing 6 cups of salted water to a rolling boil. Add your elbow macaroni and cook it for 6 minutes until just tender. Proper timing here is key—you want the pasta cooked through but not mushy so it holds its shape in the balls. Drain thoroughly and set aside while you prepare the cheese sauce.
Step 2: Make the Roux with Spice
In the same pot, melt the butter over medium heat. Whisk in the flour, cayenne pepper, garlic powder, onion powder, kosher salt, and black pepper. Continue whisking the mixture until it begins to brown lightly, about 2 minutes. This flavorful roux is the foundation of your cheese sauce, so let it develop a bit of color and spice to deepen the taste.
Step 3: Create a Creamy Cheese Sauce
Slowly add the milk while whisking constantly to prevent lumps. Continue cooking and stirring for about 5 minutes, until the sauce thickens and becomes silky. This step transforms simple ingredients into that luscious creamy base that clings to the pasta.
Step 4: Add the Cheeses and Mix with Pasta
Turn off the heat and fold in the shredded cheddar and mozzarella, stirring until they melt completely into the sauce. Then add your cooked pasta back into the pot and mix everything to combine. The pasta is now coated in rich, melty cheese, ready to cool and firm up.
Step 5: Chill the Mac and Cheese
Transfer your mac and cheese to a 9×13-inch baking dish, spreading it evenly. Cover the dish and refrigerate for at least 2 hours. This firm chilling step is essential because it helps the mixture set, making it easier to shape into balls that hold together during frying.
Step 6: Shape the Mac and Cheese Balls
Once chilled, remove the dish and line a baking sheet with parchment paper. Use your hands or a small scoop to form equal-sized 2-inch balls and place them on the sheet. This part is so fun—you’ll see how nicely the macaroni holds its shape when chilled properly!
Step 7: Freeze the Balls
Cover the baking sheet tightly and freeze the balls for at least 2 hours. Freezing these before frying prevents them from falling apart when they hit the hot oil and ensures a perfectly crisp crust.
Step 8: Prepare for Frying
Fill a deep pan or Dutch oven with about 3 inches of vegetable oil and heat it up to 300°F. While waiting for the oil to heat, whisk your eggs and water in a shallow bowl, and place the panko breadcrumbs in another bowl. This classic dipping station will coat your mac and cheese balls in a light, crunchy shell.
Step 9: Coat the Frozen Balls
Work quickly but gently: dip each frozen mac and cheese ball first into the egg wash, then roll in the panko crumbs until fully covered. This double coating is the secret to achieving the golden crunch that makes this Fried Mac and Cheese Balls Recipe so irresistible.
Step 10: Fry Until Golden Perfection
Fry the balls in batches of 5-6, maintaining the oil temperature at around 300°F. Cook each batch for about 3 minutes, flipping halfway through so they brown evenly. The goal is a deep golden crust encasing that creamy, cheesy center. Drain them on a cooling rack to avoid sogginess.
Step 11: Serve and Enjoy!
Serve the Fried Mac and Cheese Balls straight from the oil with your favorite dipping sauces. Each bite delivers comfort, crunch, and cheesy delight in perfect harmony. Trust me, these are going to vanish fast!
How to Serve Fried Mac and Cheese Balls Recipe
Garnishes
A sprinkle of freshly chopped parsley or chives adds a burst of color and fresh flavor that balances the rich cheese. You can also dust some smoked paprika or a light sprinkle of Parmesan to elevate the presentation and taste.
Side Dishes
These fried mac and cheese bites pair wonderfully with crisp salads, tangy pickles, or a refreshing slaw to cut through the richness. They also shine alongside roasted vegetables or a simple marinara dipping sauce for extra zest.
Creative Ways to Present
For parties, create a grazing board with various dipping sauces like spicy sriracha mayo, garlic aioli, or honey mustard. Serving them in mini cupcake liners or on skewers with cherry tomatoes adds a festive touch. You can also stuff these balls with bits of cooked bacon or jalapeños for an exciting surprise inside!
Make Ahead and Storage
Storing Leftovers
If you have any leftover Fried Mac and Cheese Balls, let them cool completely before storing them in an airtight container. Keep them refrigerated for up to 3 days. This lets you enjoy cheesy goodness even after the initial feast.
Freezing
Thanks to the freezing step in the recipe, you can freeze any leftover uncooked mac and cheese balls as well. Arrange them on a baking sheet so they don’t stick together, then transfer to a freezer-safe container. They will keep perfectly for up to 3 months, ready for whenever a crispy snack craving hits.
Reheating
For best results, reheat leftover fried balls in a preheated oven at 375°F for about 10 minutes or until warmed through and crispy again. Avoid the microwave if you want to preserve that delightful crunch on the outside.
FAQs
Can I use a different type of pasta?
Absolutely! Though elbow macaroni is traditional and holds sauce well, you can experiment with small pasta shapes like shells or cavatappi. Just keep in mind cooking times and shape stability when shaping balls.
What if I don’t have panko breadcrumbs?
Regular breadcrumbs can work in a pinch, but panko provides a lighter, crunchier coating. You could also crush cornflakes or use crushed crackers for an interesting texture.
How spicy is this recipe with cayenne pepper?
The recipe includes a small amount of cayenne for warmth, but it’s quite mild. You can adjust or omit it based on your spice preference.
Can I bake the mac and cheese balls instead of frying?
Yes, baking is a healthier alternative. Preheat your oven to 400°F, place the breaded balls on a parchment-lined sheet, and bake for about 20 minutes or until golden and crispy, flipping halfway through.
Is this recipe suitable for making ahead for a party?
Definitely! You can prepare, shape, and freeze your mac and cheese balls well in advance. On party day, simply fry or bake them straight from the freezer for a quick, impressive appetizer.
Final Thoughts
There is something truly special about perfectly fried, cheesy bites like in this Fried Mac and Cheese Balls Recipe. They bring smiles with every crispy, gooey bite and are so versatile for any occasion. I encourage you to dive into this recipe and make it your own—it’s bound to become a beloved favorite among friends and family, just like it is in my kitchen. Happy frying!