“`html
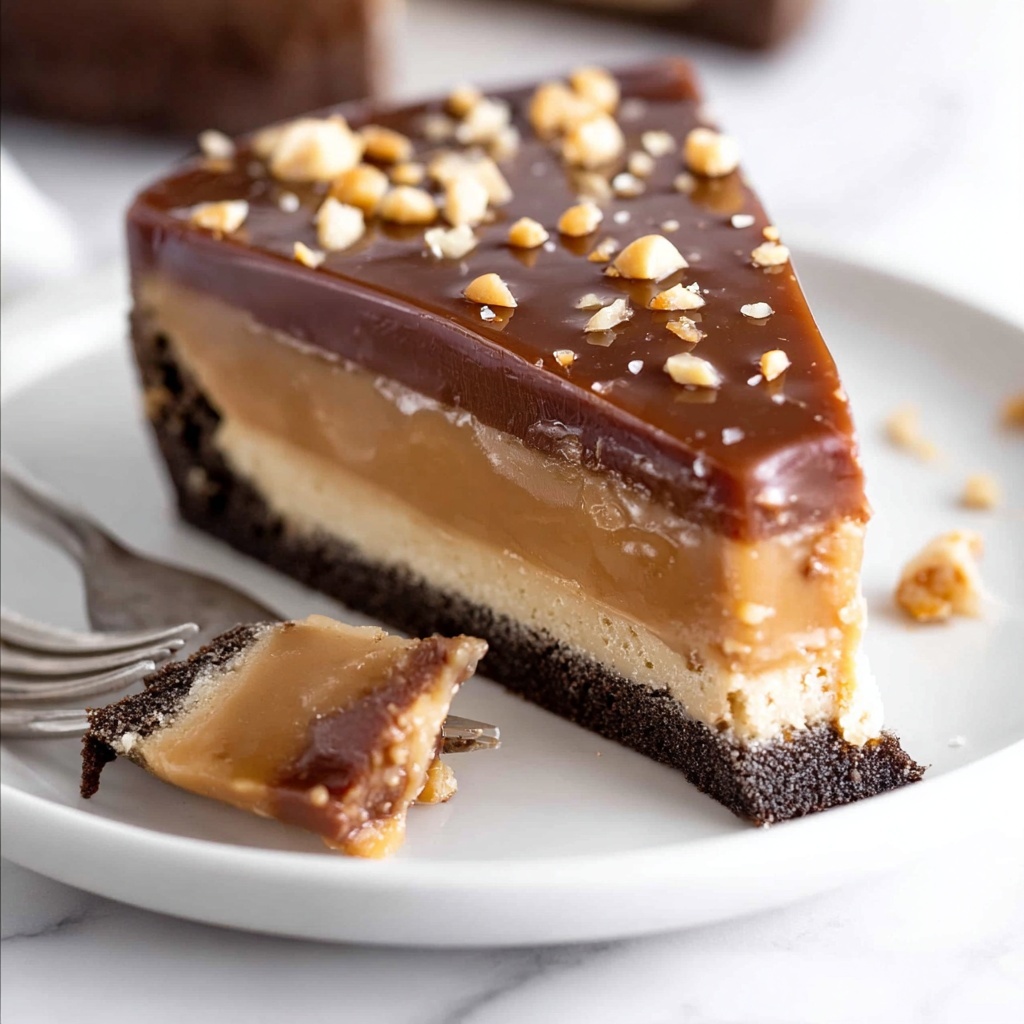
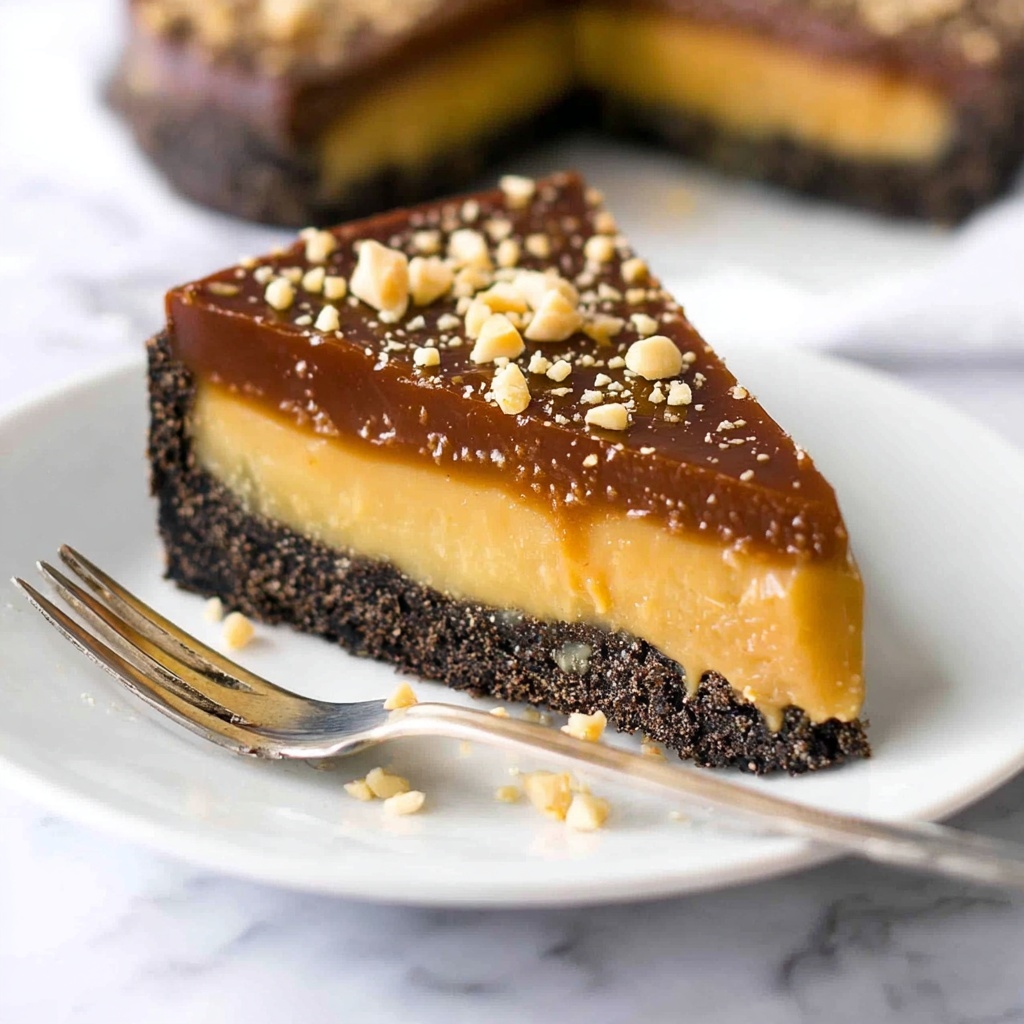
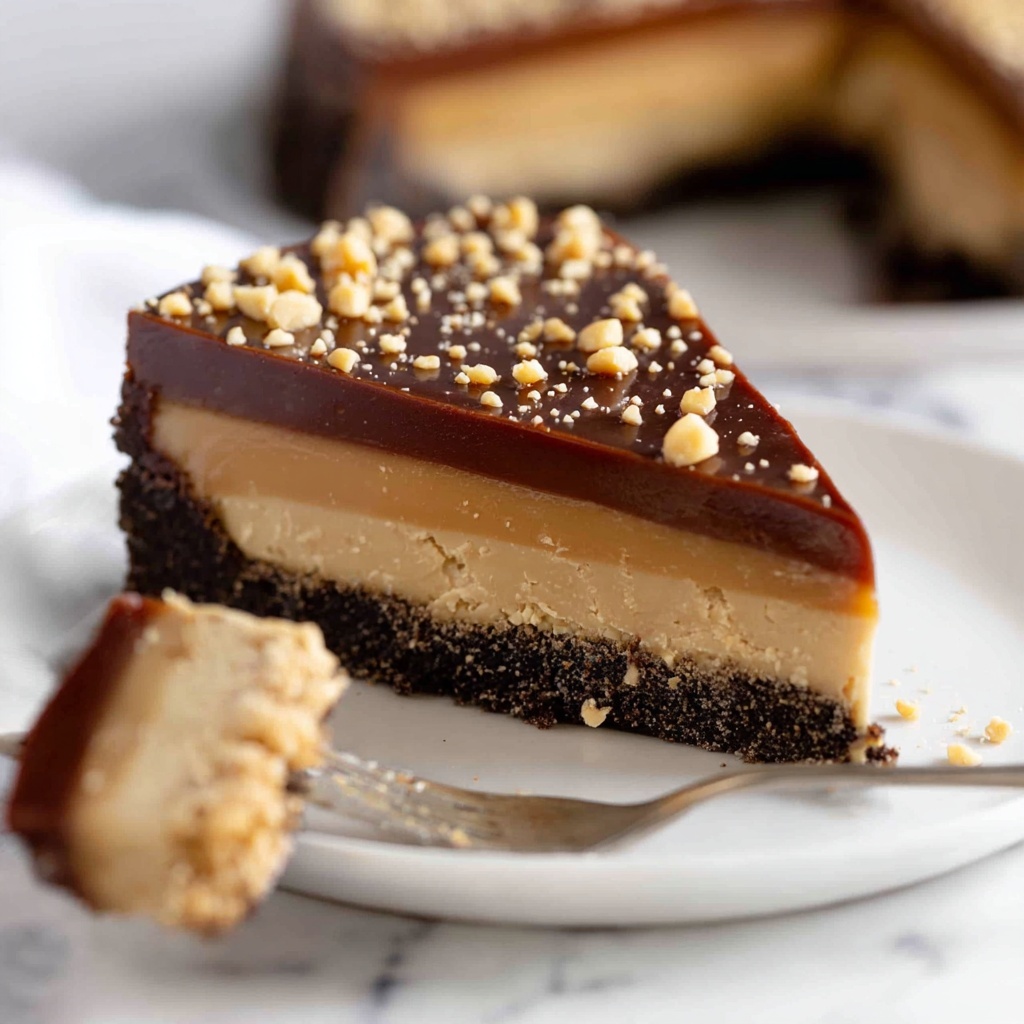
If you have a sweet tooth and an abiding love for all things peanut butter and caramel, then this Peanut Butter Caramel Pie Recipe is going to be your new obsession. Imagine a rich, creamy peanut butter filling layered atop a crispy Oreo crust, all crowned with a luscious caramel glaze and a drizzle of chocolate, finished off with a delightful crunch of chopped peanuts. This pie is a celebration of textures and flavors that will make every bite an indulgent delight. Perfect for family gatherings or just a cozy dessert night in, this pie is as impressive in taste as it is simple to make.
Ingredients You’ll Need
This Peanut Butter Caramel Pie Recipe combines straightforward, pantry-friendly ingredients that each play a crucial role in creating a perfect balance of flavors and textures. From the buttery Oreo crust to the creamy peanut butter filling and homemade caramel glaze, every component harmonizes beautifully.
- 274g / 9.5 oz Oreo cookies: These create a chocolatey, crunchy base that perfectly supports the creamy filling.
- 60g / 4 tbsp butter, melted: Used to bind the crust, butter adds richness and helps the crust hold its shape.
- Pinch of salt: Enhances all flavors and balances the sweetness.
- 100g (7 tbsp) unsalted butter: For the caramel, adding smoothness and depth.
- 1/2 cup (110g) packed brown sugar: Gives the caramel its signature molasses flavor and beautiful color.
- 1 can sweetened condensed milk (395g/14oz): The base of the caramel, lending creaminess and sweetness.
- 1/4 cup (65ml) cream, full fat: Adds silkiness to the caramel, making it perfectly luscious.
- 1 tsp salt: Key for balancing the sweetness in the caramel layer.
- 1 cup (280g) smooth peanut butter: The star of the pie, creamy and fragrant, providing that irresistible peanut butter punch.
- 1/3 cup (85ml) heavy/thickened cream: Folded into the peanut butter to create a light, fluffy filling.
- 150g / 5 oz milk chocolate chips: For melting over the top as a rich, glossy finish.
- 1/4 cup roughly chopped peanuts: Adds a satisfying crunch and enhances the peanut flavor.
How to Make Peanut Butter Caramel Pie Recipe
Step 1: Prepare the Crust
Start by greasing and lining the base only of a 23cm / 9″ tart tin with a loose base or pie dish—this will give you easy pie removal later on. Preheat your oven to 160C / 325F. Next, crush the Oreo cookies until they become fine crumbs; then mix them thoroughly with the melted butter and a pinch of salt. Press this mixture evenly into the base of your tin, forming a firm crust. Pop it in the oven and bake for about 10 minutes to set the crust perfectly before adding the filling.
Step 2: Make the Caramel Layer
While your crust is baking, it’s time for the caramel magic. In a saucepan, melt 100g unsalted butter over medium heat. Stir in the brown sugar and sweetened condensed milk, whisking constantly until the mixture is smooth and starts to thicken slightly—this usually takes around 5 minutes. Add the cream and 1 teaspoon of salt, continuing to stir until the caramel becomes silky and has a slight golden hue. This homemade caramel will tie the pie together with its buttery sweetness and a gentle salty kick.
Step 3: Prepare the Peanut Butter Filling
The peanut butter filling is what makes this pie absolutely divine. Take the smooth peanut butter and mix it with the heavy cream until light and fluffy. This combination makes the filling creamy but airy, so it melts on your tongue rather than feeling dense. Once your caramel has cooled slightly but is still pourable, gently fold it into the peanut butter mixture to blend those two iconic flavors together beautifully.
Step 4: Assemble the Pie
Pour the peanut butter and caramel filling over your baked Oreo crust, smoothing the top with a spatula. This is where the magic truly comes together. Now, melt the milk chocolate chips over a double boiler or in short bursts in the microwave until glossy and smooth. Drizzle the melted chocolate over the pie for added decadence, then sprinkle the roughly chopped peanuts on top for a perfectly textured finish.
Step 5: Chill and Set
Place your pie in the refrigerator and allow it to chill for at least 4 hours, or preferably overnight. This resting time helps all the layers to set beautifully, so every slice holds its shape and every bite offers that fantastic contrast of crunchy crust, creamy filling, and gooey caramel. When ready, remove the pie carefully from the tin and get ready to impress!
How to Serve Peanut Butter Caramel Pie Recipe
Garnishes
For a stunning presentation, consider topping your Peanut Butter Caramel Pie with a dollop of freshly whipped cream and a light sprinkle of sea salt flakes. This will enhance the pie’s sweetness and add a creamy, airy element. A few extra chopped peanuts or a light drizzle of caramel sauce will make it look irresistible on any dessert table.
Side Dishes
This pie stands out on its own, but pairing it with a scoop of vanilla bean ice cream or a simple fruit salad can provide a refreshing balance to its rich flavors. Fresh berries or sliced bananas complement the peanut butter and caramel beautifully without overpowering the pie’s complex profile.
Creative Ways to Present
Try serving this pie in individual portions for a fun twist—mini tartlets or even layered parfait glasses with broken crust, filling, and toppings make great party treats. You might also drizzle some extra peanut butter sauce or chocolate ganache artistically over the serving plate to add a gourmet touch to your presentation.
Make Ahead and Storage
Storing Leftovers
Once baked and chilled, this Peanut Butter Caramel Pie Recipe can be covered tightly with plastic wrap and stored in the refrigerator for up to 4 days. Keeping it cold maintains the filling’s creamy texture and prevents the crust from becoming soggy.
Freezing
If you want to keep this pie for longer, freezing is an excellent option. Wrap the pie securely in plastic wrap and then in aluminum foil to protect against freezer burn. It can be frozen for up to 2 months. When ready to enjoy, thaw it overnight in the fridge for the best texture and flavor retention.
Reheating
This pie is best enjoyed cold, so reheating is not recommended. If you want a slightly softer texture, leave it out at room temperature for 20 to 30 minutes before serving. This will bring out the full richness of the peanut butter and caramel without losing any of the pie’s classic creamy consistency.
FAQs
Can I use a different cookie for the crust?
Absolutely! While Oreo cookies give a great chocolate base, you can swap with chocolate graham crackers or even digestive biscuits for a different twist. Just ensure the cookie is finely crushed and mixed well with butter to set the crust properly.
What type of peanut butter works best?
Smooth peanut butter is ideal here because it blends easily and gives the filling a silky texture. Avoid chunky peanut butter, as it can introduce unwanted chunks in the creamy filling, although you could sprinkle some crunchy peanuts on top for texture.
Is it possible to make this recipe vegan?
With some ingredient swapping, yes! Use vegan butter, a plant-based condensed milk alternative, and dairy-free cream. For the chocolate, pick vegan chocolate chips. Keep in mind the texture and flavor might vary slightly but it will still be delicious.
Can I make this pie gluten-free?
Definitely! Replace the Oreo cookies with a gluten-free chocolate cookie or cracker of your choice. Make sure all other ingredients, especially chocolate chips, are certified gluten-free for safety.
How long will this pie keep in the fridge?
This Peanut Butter Caramel Pie Recipe stays fresh and tasty for up to 4 days refrigerated. Beyond that, flavors may begin to deteriorate, and the texture may change, so it’s best enjoyed within that time.
Final Thoughts
This Peanut Butter Caramel Pie Recipe is truly a crowd-pleaser and an absolute joy to make. Its perfect layers of crunchy crust, silky caramel, and luscious peanut butter filling make for a dessert experience you will want to share again and again. Give it a try and watch it become your go-to recipe when you want to impress with minimal fuss and maximum flavor.
“`