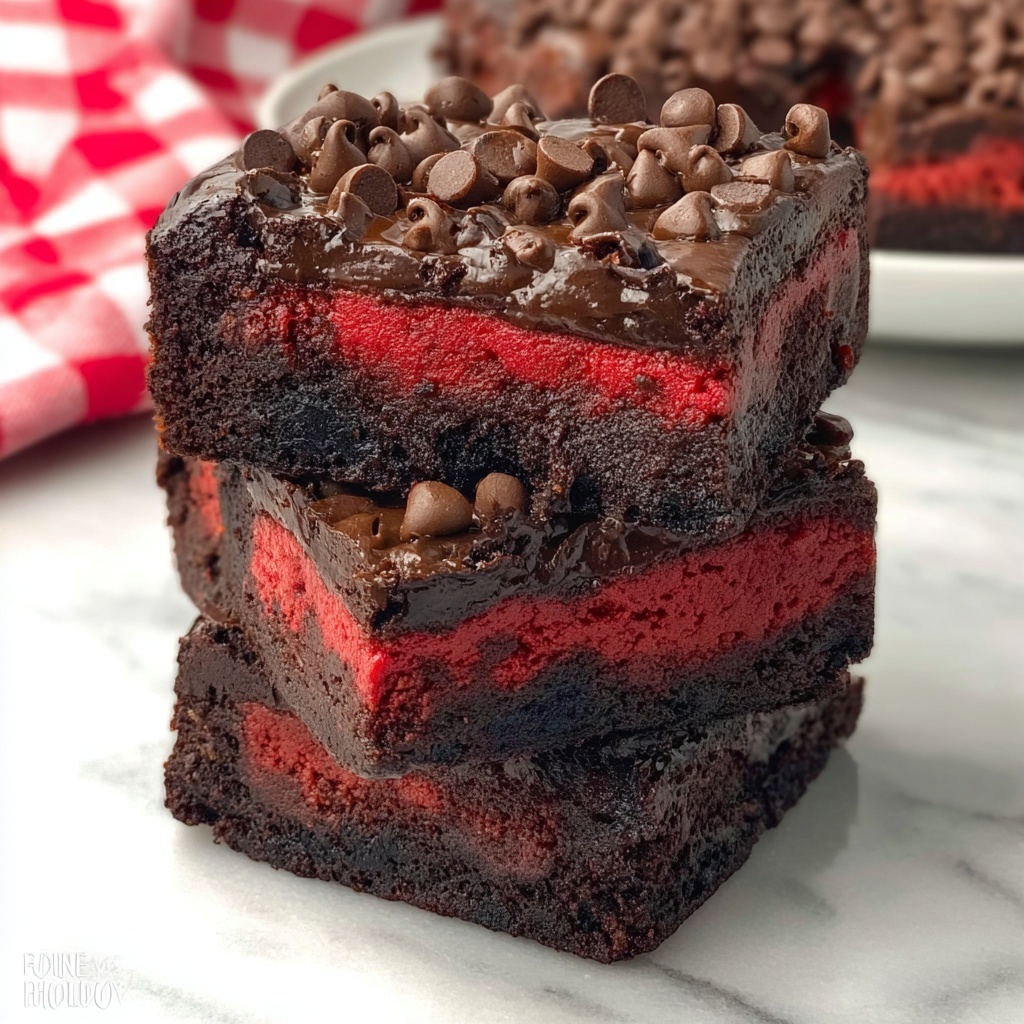
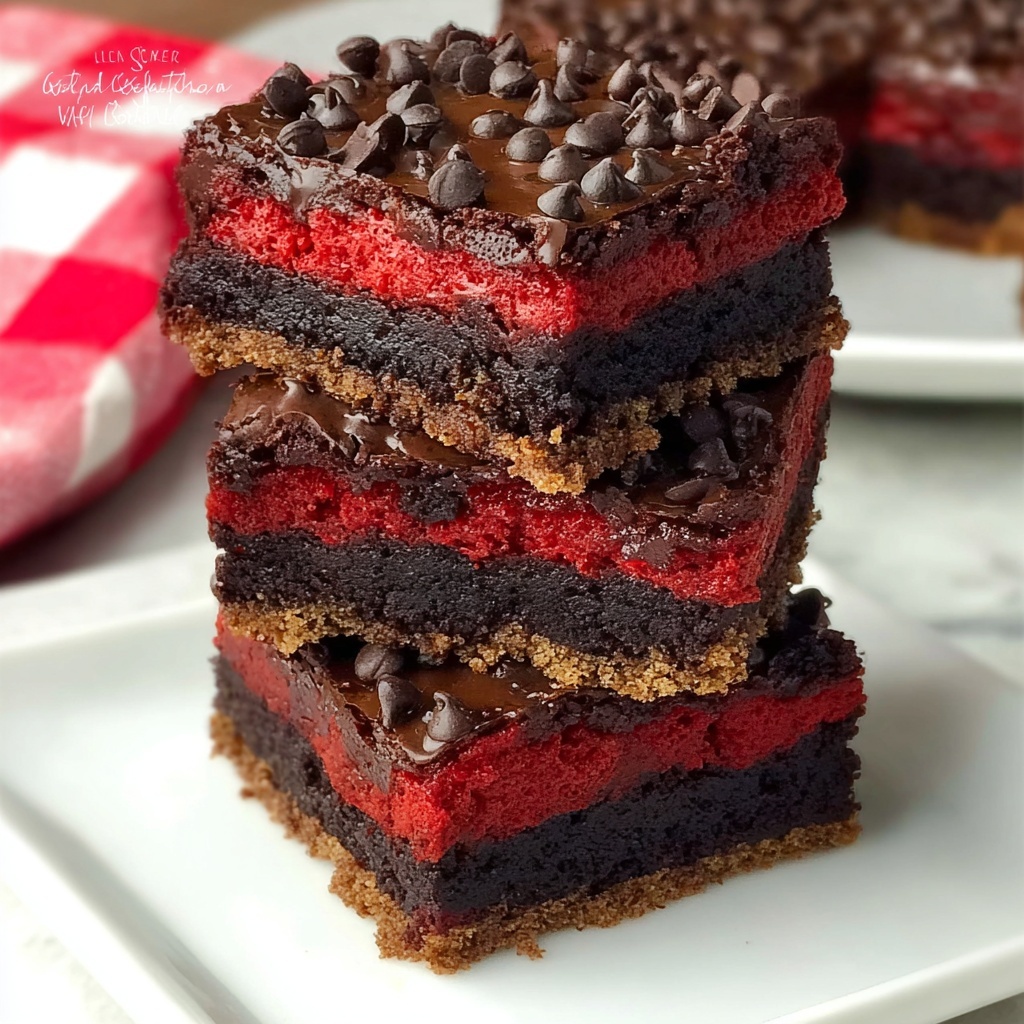
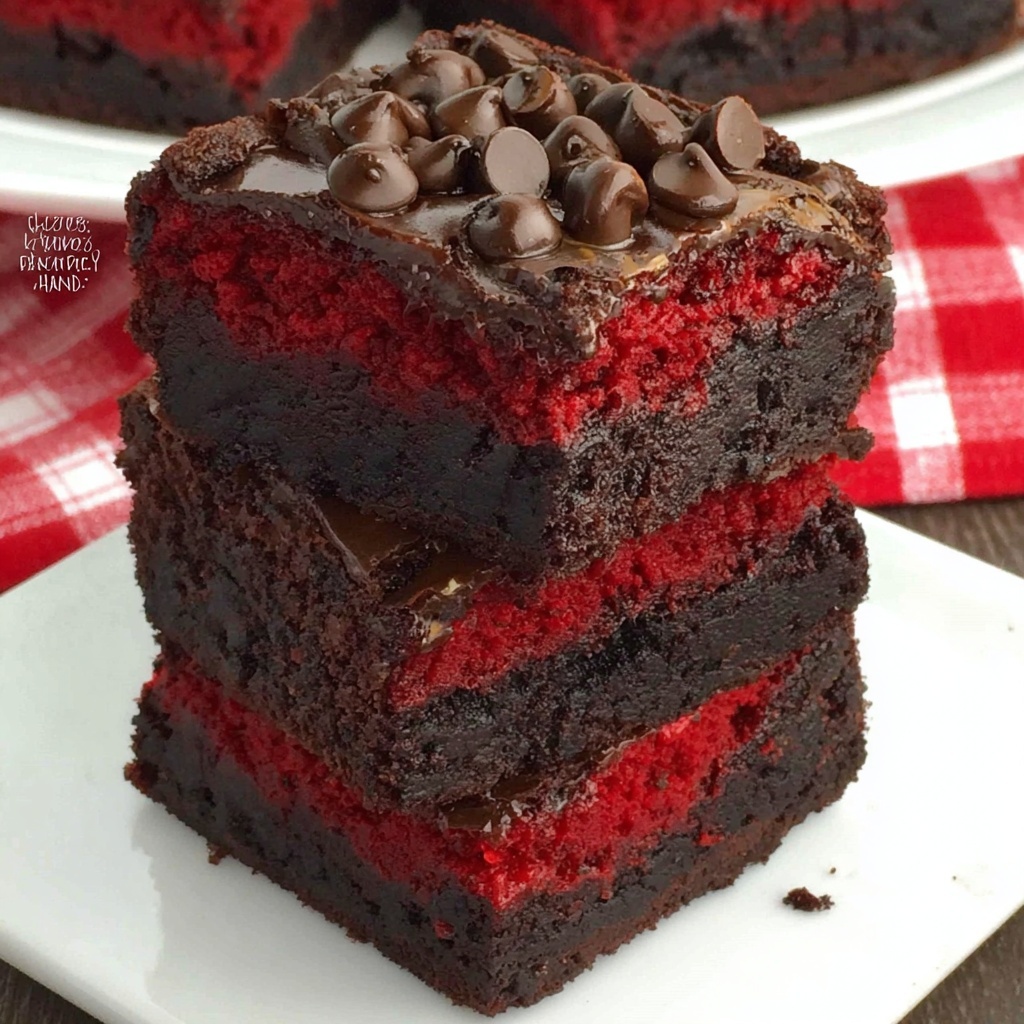
If you have a sweet tooth and love combining distinct flavors into one extraordinary treat, this Red Velvet Brownies with Oreo Layer and Chocolate Ganache Recipe is going to become your new favorite. Imagine the vibrant red velvet brownie base, packed with rich cocoa flavor and just the right amount of tang from the cream cheese-like undertones, layered with a delightful crunch from the Oreo cookies, and finished off with a velvety, glossy chocolate ganache topped with mini chocolate chips. It is a show-stopping dessert that delivers on both flavor and texture, perfect for impressing friends or indulging in a self-care moment that feels nothing short of luxurious.
Ingredients You’ll Need
Getting your ingredients together for this recipe is simple, yet each element plays a crucial role in building the layers of flavor and texture that make these brownies truly unforgettable. From the moist and tender red velvet cake mix to the creamy, indulgent chocolate ganache, every ingredient is an essential player in this dessert symphony.
- Red velvet cake mix: The base for your brownies, providing that signature color and subtle cocoa flavor perfect for this recipe.
- Unsalted sweet cream butter: Melted butter adds richness and helps create a tender texture.
- Eggs: They bind the batter together and add moisture to keep the brownies soft.
- Holiday Oreos: These cookies bring a fun, festive crunch and creamy filling that pairs beautifully with red velvet.
- Milk chocolate chips: Base for the ganache that offers a smooth, sweet chocolate layer.
- Mini chocolate chips: A finishing touch for added texture and chocolate bursts.
- Heavy whipping cream: Combined with chocolate chips to create the luxurious ganache topping.
How to Make Red Velvet Brownies with Oreo Layer and Chocolate Ganache Recipe
Step 1: Preheat Your Oven
Start by preheating your oven to 350°F. A hot oven is crucial so your brownies bake evenly and develop that perfect soft but slightly chewy texture.
Step 2: Prepare the Red Velvet Batter
In a standing mixer, combine your red velvet cake mix with half of the melted butter and eggs. Beat them until you have a smooth, fully combined batter. This step ensures your brownies will be moist and tender with that classic red velvet flavor.
Step 3: Press the Batter into the Pan
Using your hands or a spatula, press the red velvet batter evenly into the bottom of a prepared baking pan. This layer acts as a sturdy, colorful base for the Oreo layer you’ll be adding next.
Step 4: Add Whole Oreos and Bake
Place a few whole Holiday Oreos spaced throughout the brownie batter. This gives pockets of creamy crunch in every bite. Bake this layer for 13 minutes – just enough for the brownies to set but still be soft.
Step 5: Crush More Oreos
While your brownie base is baking, crush one whole package of Oreos inside a ziplock bag. This crushed Oreo will serve as the middle layer, adding texture and an extra dose of that beloved cookie flavor.
Step 6: Mix Crushed Oreos with Butter
Combine the crushed Oreos with the remaining half-cup of melted butter. This mixture will create a cohesive, buttery Oreo layer that presses perfectly onto the warm brownie base.
Step 7: Layer Oreo Mixture on Brownies
Once the brownies are out of the oven, carefully spread the Oreo and butter mixture evenly over the top. Gently press it down so it sticks and forms a delicious crust.
Step 8: Prepare the Chocolate Ganache
Place your milk chocolate chips in a large mixing bowl, ready for the indulgent ganache.
Step 9: Heat the Heavy Cream
Warm the heavy whipping cream in a saucepan until it reaches a low boil. This hot cream is key to melting the chocolate chips smoothly.
Step 10: Combine Cream and Chocolate
Pour the hot cream over the milk chocolate chips and let the mixture sit for 5 minutes. Then whisk until completely smooth and thickened into a luscious ganache.
Step 11: Add Ganache and Mini Chocolate Chips
Pour the ganache over the Oreo layer, spreading it evenly. Sprinkle generously with mini chocolate chips for a perfect finishing touch.
Step 12: Chill to Set
Place the entire pan in the refrigerator for 30 to 45 minutes to allow the ganache to firm up beautifully.
Step 13: Cut and Enjoy!
Once set, slice your brownies into bars and serve alongside a tall glass of milk or a warm cup of coffee to balance the rich chocolate and red velvet flavors.
How to Serve Red Velvet Brownies with Oreo Layer and Chocolate Ganache Recipe
Garnishes
For an extra special touch, dust the brownies with a light sprinkle of powdered sugar or add a few fresh berries on top. This adds a pop of color and a fresh contrast to the rich chocolate and red velvet layers.
Side Dishes
Pair these brownies with simple vanilla ice cream or a dollop of whipped cream. The creamy, cool sides complement the warm, dense brownies and enhance every bite.
Creative Ways to Present
Serving these brownies as mini squares on a dessert platter, garnished with mint leaves or alongside coffee, transforms them into a sophisticated treat perfect for parties or special occasions. You could even try layering them in a dessert trifle for an impressive presentation.
Make Ahead and Storage
Storing Leftovers
Store leftovers in an airtight container at room temperature for up to two days or in the fridge for up to a week. This keeps the ganache intact while maintaining the brownie’s moisture and texture.
Freezing
You can freeze these brownies by wrapping them tightly in plastic wrap and placing them in a freezer-safe container. Freeze for up to three months for the best flavor and texture when thawed.
Reheating
Allow frozen brownies to thaw in the refrigerator overnight. For a warm treat, microwave individual squares for 10-15 seconds or oven-bake at low heat until warmed through, but be careful not to melt the ganache layer too much.
FAQs
Can I use homemade red velvet batter instead of cake mix?
Absolutely! Homemade batter works wonderfully if you prefer to make everything from scratch. Just remember to keep the texture dense enough to hold the Oreo layers well.
What type of Oreo cookies are best to use?
Holiday Oreos or any festive-flavored Oreos add a fun seasonal twist, but classic Oreos also work perfectly. Choose your favorite flavor to customize.
Is the ganache made only with milk chocolate?
For this recipe, milk chocolate is recommended for its smooth sweetness, but you can experiment with dark or semi-sweet chocolate to adjust the richness as you like.
Can I substitute the butter with oil?
Butter gives a specific richness and helps the Oreo mixture stick; however, melted coconut oil can be a good dairy-free alternative if needed.
How do I ensure the ganache sets properly?
Make sure to refrigerate the brownies for at least 30 minutes after pouring the ganache. The cold temperature firms up the ganache into a luscious, sliceable layer.
Final Thoughts
This Red Velvet Brownies with Oreo Layer and Chocolate Ganache Recipe is pure magic for anyone who loves layered desserts with texture and incredible flavor combinations. Once you try it, you’ll find yourself craving these rich, velvety brownies with crunchy Oreos and silky ganache time and time again. So go ahead, gather your ingredients, and get baking — unforgettable dessert moments await!