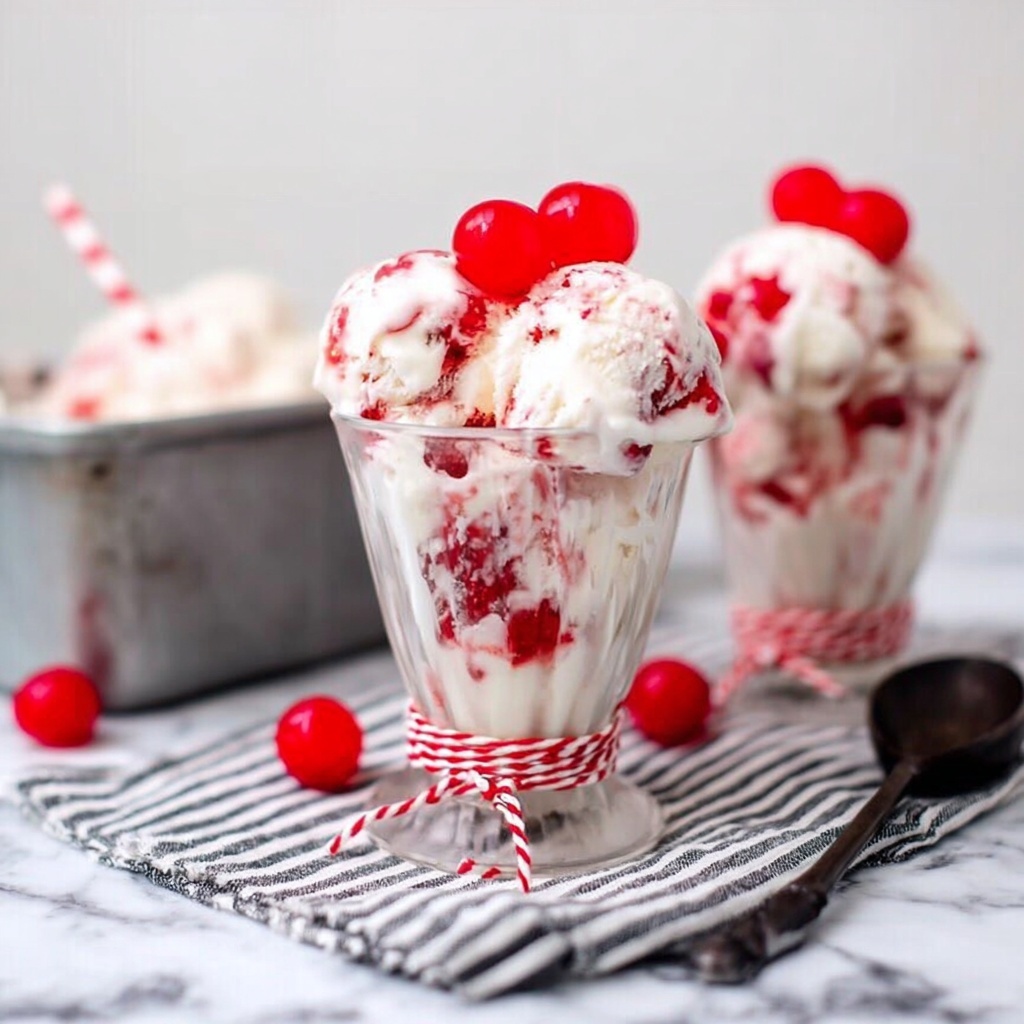
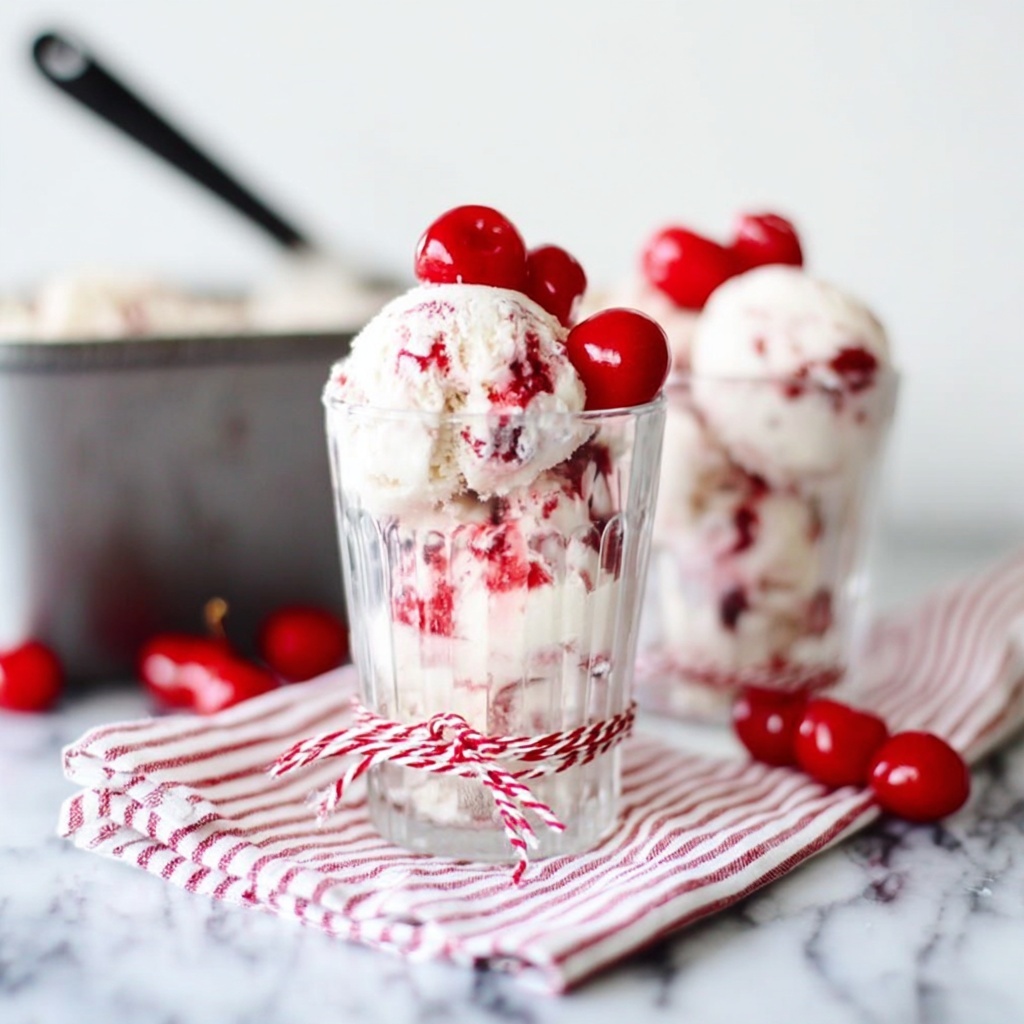
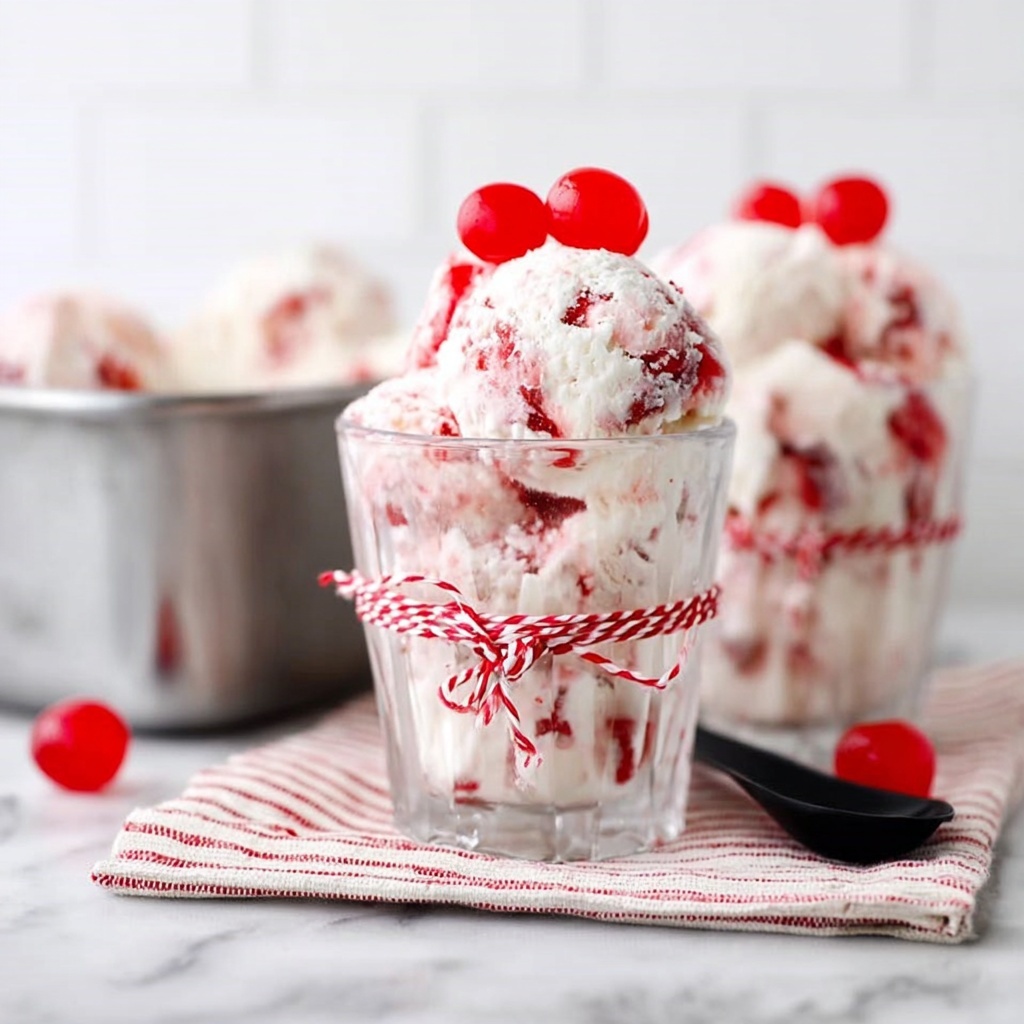
If you have a sweet tooth but no ice cream machine, this No-Churn Cherry Ice Cream Recipe will quickly become your new favorite indulgence. It combines the luscious creaminess of homemade ice cream with the vibrant, tangy bursts of cherry pie filling, all whipped up effortlessly in no time. This recipe spins simple ingredients into a dreamy frozen treat that’s perfect for any occasion, whether a casual day at home or a celebration with loved ones.
Ingredients You’ll Need
Gathering these straightforward but essential ingredients sets you up for success in making a rich, smooth ice cream with delightful cherry accents. Each component plays a vital role in achieving the perfect balance of flavor and texture.
- Heavy Whipping Cream: Provides the creamy, airy base that whips into fluffy peaks for that classic ice cream texture.
- Sweetened Condensed Milk: Adds natural sweetness and creaminess without the need for granulated sugar.
- Vanilla Extract: Brings warmth and depth to the ice cream base, enhancing all the other flavors.
- Cream Cheese (softened): Gives a slight tang and extra smoothness, making the ice cream irresistibly luscious.
- Cherry Pie Filling: Offers bursts of juicy, sweet-tart cherries and a beautiful pop of color.
- Ice Cream Cones (optional): For serving, adding a classic touch and a satisfying crunch.
- Maraschino Cherries: Ideal for topping, providing a festive finishing touch and extra cherry flavor.
How to Make No-Churn Cherry Ice Cream Recipe
Step 1: Whip the Cream
Start by pouring the heavy whipping cream into the mixing bowl of your stand mixer. Whip the cream on medium-high speed until it thickens and forms stiff peaks. This step is crucial because the light, airy whipped cream is the foundation for your ice cream’s creamy texture without needing a machine.
Step 2: Blend in the Sweetened Condensed Milk and Cream Cheese
Next, add the sweetened condensed milk, vanilla extract, and softened cream cheese to the whipped cream. Blend everything together gently but thoroughly until the mixture becomes smooth and creamy. The cream cheese adds a subtle richness and depth, while the condensed milk sweetens the mix perfectly without graininess.
Step 3: Fold in the Cherry Pie Filling
Gently fold the cherry pie filling into the ice cream base, making sure to distribute the cherries evenly without deflating the whipped cream. Those juicy cherries and the sticky pie syrup are what give this recipe its character and burst of flavor in every bite.
Step 4: Freeze Overnight
Transfer your combined mixture into a loaf pan or airtight container and smooth the top. Cover and place it in the freezer to set overnight. This slow freeze allows your No-Churn Cherry Ice Cream Recipe to develop that ideal scoopable texture reminiscent of traditional churned ice cream.
How to Serve No-Churn Cherry Ice Cream Recipe
Garnishes
Topping your scoops with luscious maraschino cherries immediately brightens the bowl and enhances the overall cherry experience. You can also drizzle a little extra cherry pie filling on top to keep those fruit flavors front and center.
Side Dishes
This ice cream pairs beautifully with simple desserts like warm brownies, freshly baked cookies, or even a light sponge cake. The contrast between hot and cold or soft and crunchy textures elevates your dessert game instantly.
Creative Ways to Present
Try serving your No-Churn Cherry Ice Cream Recipe in waffle cones or hollowed-out fresh strawberries for a fun and elegant presentation. You can also layer it with cherries and whipped cream in parfait glasses for a show-stopping dessert that will impress guests effortlessly.
Make Ahead and Storage
Storing Leftovers
Keep your leftover No-Churn Cherry Ice Cream Recipe tightly covered in an airtight container to prevent ice crystals and freezer burn. Proper storage helps maintain the creamy texture and vibrant cherry flavor for up to two weeks.
Freezing
Freezing this ice cream is wonderfully straightforward since it requires no churning. Ensure your container is sealed well to avoid absorbing any unwanted freezer odors, and it will freeze into perfect scoops every time.
Reheating
Ice cream is best enjoyed cold, so reheating isn’t recommended. If the ice cream becomes too hard after long freezer storage, simply let it sit at room temperature for 5-10 minutes before scooping to soften it up nicely.
FAQs
Can I use fresh cherries instead of cherry pie filling?
Absolutely! Fresh cherries add a natural, less sweet flavor and a bit more texture. Just pit and chop them before folding in. You might want to add a touch of sugar or honey to mimic the sweetness of pie filling.
Do I need any special equipment for this No-Churn Cherry Ice Cream Recipe?
The beauty of this recipe is its simplicity. A stand mixer helps whip the cream to the right consistency, but you can also use a hand mixer or even a sturdy whisk if you’re up for a little arm workout.
Can I substitute cream cheese for something else?
While cream cheese adds a lovely tang and creaminess, you can omit it for a more traditional flavor. Greek yogurt or mascarpone can also work as alternatives, but expect subtle changes in texture and taste.
How long does it take to freeze the ice cream properly?
Freezing overnight, around 6 to 8 hours, is ideal to achieve the creamy and scoopable texture we love in this recipe. Rushing the freezing process can result in icier ice cream.
Is this recipe suitable for kids?
Definitely! This No-Churn Cherry Ice Cream Recipe is family-friendly and fun to make together. Just be mindful of any dietary restrictions or allergies, especially with sweetened condensed milk or dairy.
Final Thoughts
This No-Churn Cherry Ice Cream Recipe is a wonderful way to enjoy homemade ice cream without the fuss of machines or complicated techniques. It’s creamy, fruity, and absolutely delightful every time you serve it. I can’t wait for you to make this recipe your own and share its sweet joy with your friends and family!