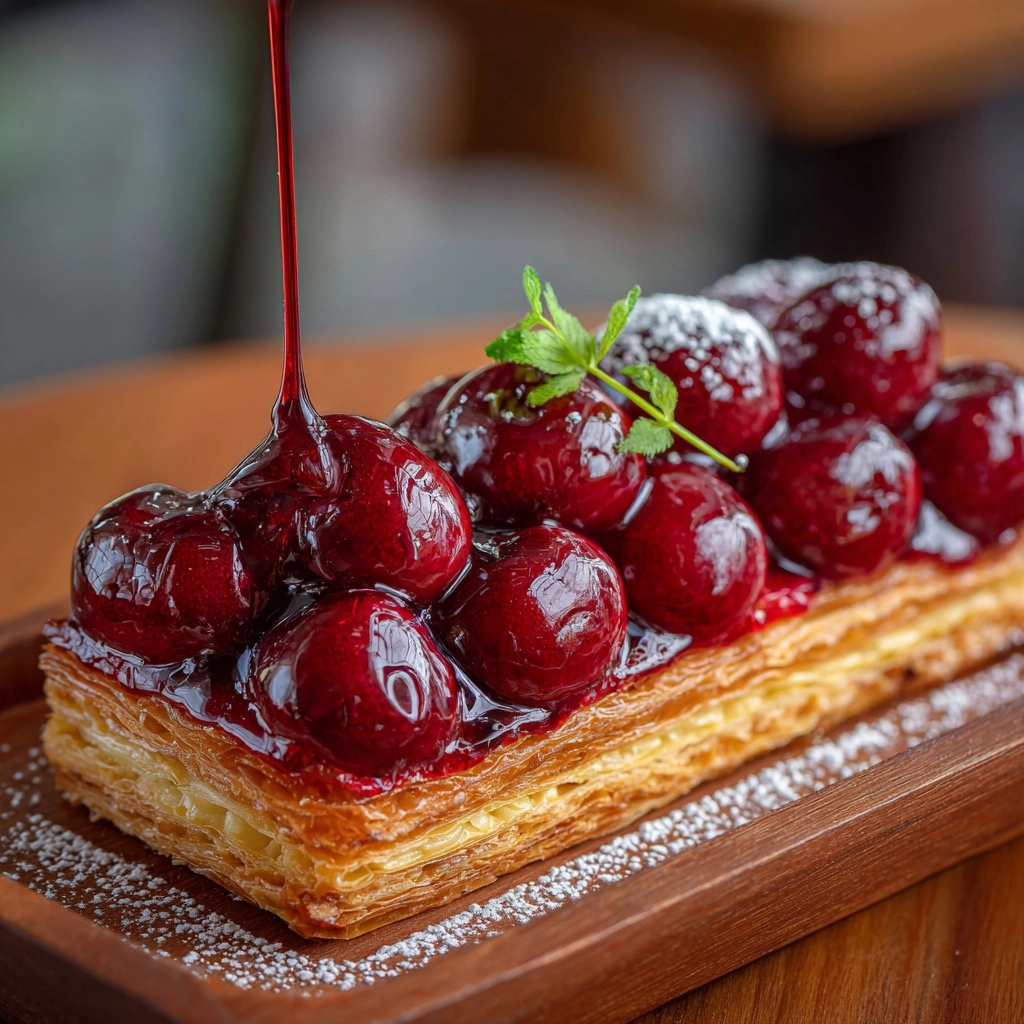
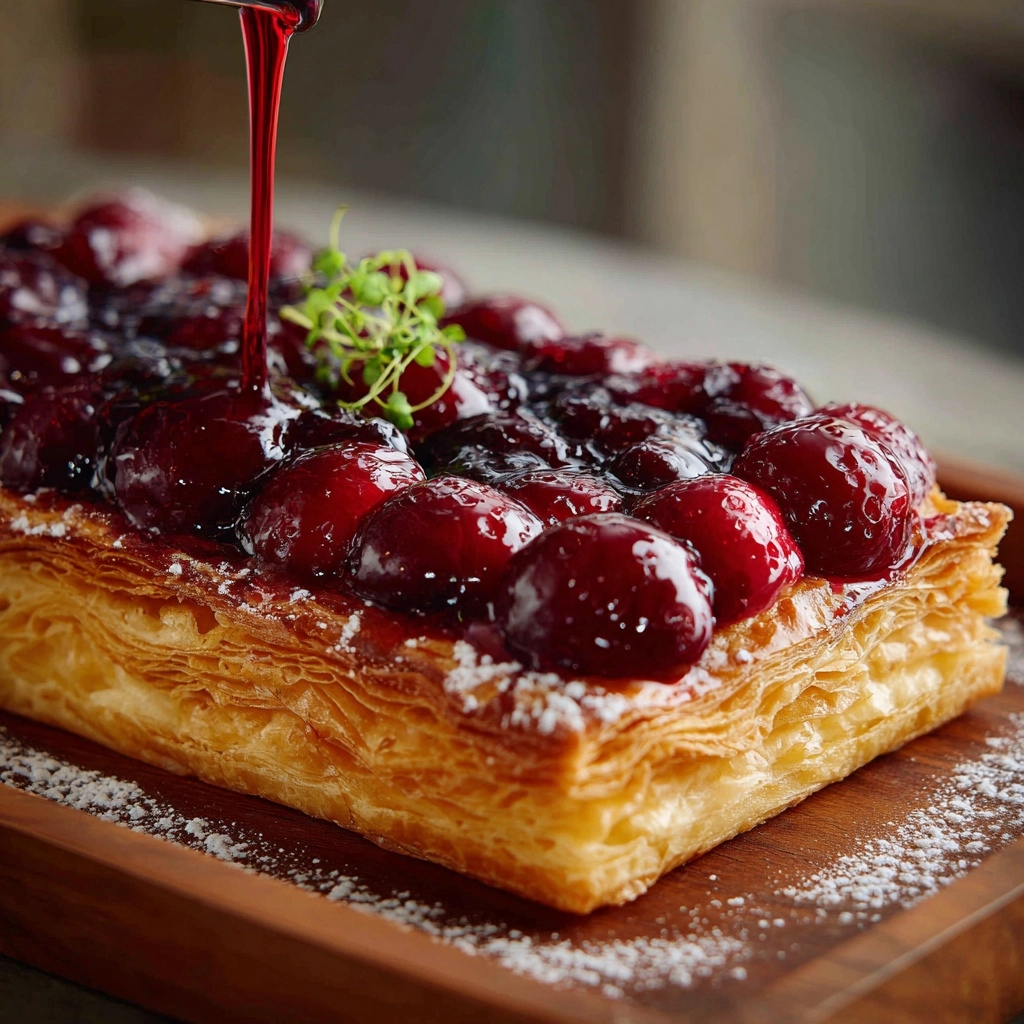
If you’re craving a simple yet stunning dessert that combines flaky pastry, creamy filling, and vibrant fruit, look no further than this Cherry Cheese Pastry Pie. With its golden puff pastry base, luscious sweet-tart cherries, and velvety cream cheese layer, this pie is bound to steal the spotlight at any gathering—or make any ordinary night feel just a little more special. It’s the kind of treat you’ll want to share with friends and family, yet it’s so easy to whip up, you might just keep it all to yourself!
Ingredients You’ll Need
Building a Cherry Cheese Pastry Pie is delightfully straightforward, and each ingredient plays a starring role in making this dessert unforgettable. From the buttery pastry to the rich cream cheese and vibrant cherries, every component adds something essential to the texture, flavor, and overall wow-factor.
- 1 sheet frozen puff pastry, thawed: The shortcut secret for an ultra-flaky, buttery crust without any fuss.
- 8 oz cream cheese, softened: Brings luscious creaminess and a gentle tang to complement the cherries.
- 1/3 cup granulated sugar: Sweetens the filling just enough to balance the tart fruit and rich cheese.
- 1 tsp vanilla extract: Adds warmth and depth to the cream cheese layer—don’t skip this tiny flavor booster!
- 1 large egg: Helps bind the filling, giving it a sturdy, sliceable texture.
- 1 tbsp all-purpose flour: Ensures the cream cheese layer stays smooth and stable once baked.
- 1 cup cherry pie filling: Gorgeous, glossy cherries add juicy bursts and that eye-catching jewel red color.
- 1 tbsp milk (for brushing): Brushing the pastry edges creates a golden, glossy finish everyone loves.
- Powdered sugar (for dusting, optional): A light snow of sweetness adds the perfect finishing touch if you like things extra pretty.
How to Make Cherry Cheese Pastry Pie
Step 1: Prepare Your Oven and Baking Sheet
Let’s get things started! Preheat your oven to 400°F (200°C) and line a baking sheet with parchment paper. The high heat helps the puff pastry spring up into those irresistible golden layers, and the parchment makes for easy cleanup and prevents sticking—no one wants to lose a crumb of this delicious pie!
Step 2: Roll Out the Pastry
On a lightly floured surface, gently roll out your thawed puff pastry. The goal is just to smooth out any crease lines from the packaging, not to make it thinner. Carefully transfer the pastry sheet to your prepared baking pan, smoothing it out so it’s ready to cradle all that creamy, cherry goodness.
Step 3: Mix Up the Cream Cheese Filling
In a mixing bowl, blend the softened cream cheese, granulated sugar, vanilla extract, egg, and flour until totally smooth. A hand mixer or stiff spatula works great here. You’re looking for a creamy, luscious consistency that will bake up soft and slightly tangy—like the perfect cheesecake layer, but easier!
Step 4: Layer the Fillings
Spread that creamy cheese mixture onto the center of your puff pastry, leaving about a 1-inch border all the way around. This border gives the pastry room to puff and become gorgeously golden. Next, gently spoon your cherry pie filling over the cream cheese, distributing the juicy cherries as evenly as possible for a lovely, ruby-red mosaic.
Step 5: Fold the Pastry and Brush the Edges
Fold the edges of the puff pastry up and slightly over the edges of the filling, pleating as needed for a pretty, rustic look. Lightly brush the exposed pastry border with milk. This helps it bake to a deeply golden, glossy finish—so tempting.
Step 6: Bake to Golden Perfection
Slide your Cherry Cheese Pastry Pie into the preheated oven and bake for 20–25 minutes, or until the pastry is puffed, flaky, and richly golden. Keep an eye on things near the end, as oven temps can vary; you want the pie to look both puffy and set, with alluring bits of cherry bubbling at the edges.
Step 7: Cool, Garnish, and Enjoy
Let your finished pie cool for about 10 minutes (if you can resist!). This helps the cream cheese layer firm up enough for neat slicing. If you prefer, dust the top with a fine shower of powdered sugar for a little extra pizzazz. Serve your Cherry Cheese Pastry Pie warm from the oven or chilled straight from the fridge—either way, it’s an absolute dream.
How to Serve Cherry Cheese Pastry Pie
Garnishes
This pie is already a beauty, but a snowy sprinkle of powdered sugar adds a bakery-style touch that makes it feel even more special. For a pop of color and flavor, try scattering a few fresh mint leaves or a handful of shaved dark chocolate on top just before serving.
Side Dishes
While the Cherry Cheese Pastry Pie steals the show on its own, it’s lovely alongside a scoop of vanilla ice cream, a dollop of whipped cream, or even a fresh fruit salad. If you’re enjoying it for brunch, pair it with a cup of strong coffee or a mimosa for an easy, elegant spread!
Creative Ways to Present
For parties, cut the pie into bite-sized squares and arrange them on a platter for a dessert buffet. You can also serve individual slices topped with a swirl of whipped cream and a drizzle of extra cherry sauce for a plated restaurant-style finish. No matter how you present it, Cherry Cheese Pastry Pie invites admiring glances and requests for seconds.
Make Ahead and Storage
Storing Leftovers
If you’re lucky enough to have leftovers, store slices in an airtight container in the fridge. The pastry will keep its charm for up to three days—though the layers will soften a bit, the flavors meld in a delicious way.
Freezing
Cherry Cheese Pastry Pie freezes beautifully! Just wrap cooled slices tightly in plastic wrap and then stash them in a zip-top bag or airtight container. They’ll stay delicious for up to one month. Thaw overnight in the fridge before serving.
Reheating
For the best texture, reheat slices in a 350°F oven for 8–10 minutes. This revives the flaky pastry and gently warms the filling without drying it out. If you’re rushing, a quick zap in the microwave works, too—just keep in mind the pastry won’t stay quite as crisp.
FAQs
Can I use homemade cherry filling instead of canned?
Absolutely! If you have fresh or frozen cherries, simply cook them down with a bit of sugar and cornstarch until thick and glossy. Homemade filling gives your Cherry Cheese Pastry Pie a wonderful personalized flavor.
Can I substitute another fruit?
Definitely. Blueberry, raspberry, or mixed berry pie filling would all work beautifully in this recipe, offering new twists to the classic Cherry Cheese Pastry Pie you’ll love exploring.
Does this taste best warm or cold?
You really can’t go wrong! Warm from the oven, the filling is soft and comforting, while chilled Cherry Cheese Pastry Pie is refreshingly creamy and perfect for summer gatherings. Try both and see which you prefer.
Can I add almond flavor to the cream cheese layer?
Yes, a splash of almond extract is a fantastic addition! It beautifully complements the cherry filling and brings a lovely depth to every bite of Cherry Cheese Pastry Pie.
Is it possible to make this pie ahead for a party?
Absolutely! Bake the pie a day in advance and store it covered in the fridge. A quick warm-up in the oven before serving will bring back the flakiness and aroma, making it taste freshly baked for your guests.
Final Thoughts
If you’re looking to treat yourself or wow your family with something simple, irresistible, and downright pretty, this Cherry Cheese Pastry Pie is your answer. Don’t be surprised if you find yourself reaching for this recipe again and again—it’s an easy favorite that delivers big-time flavor, every single time.