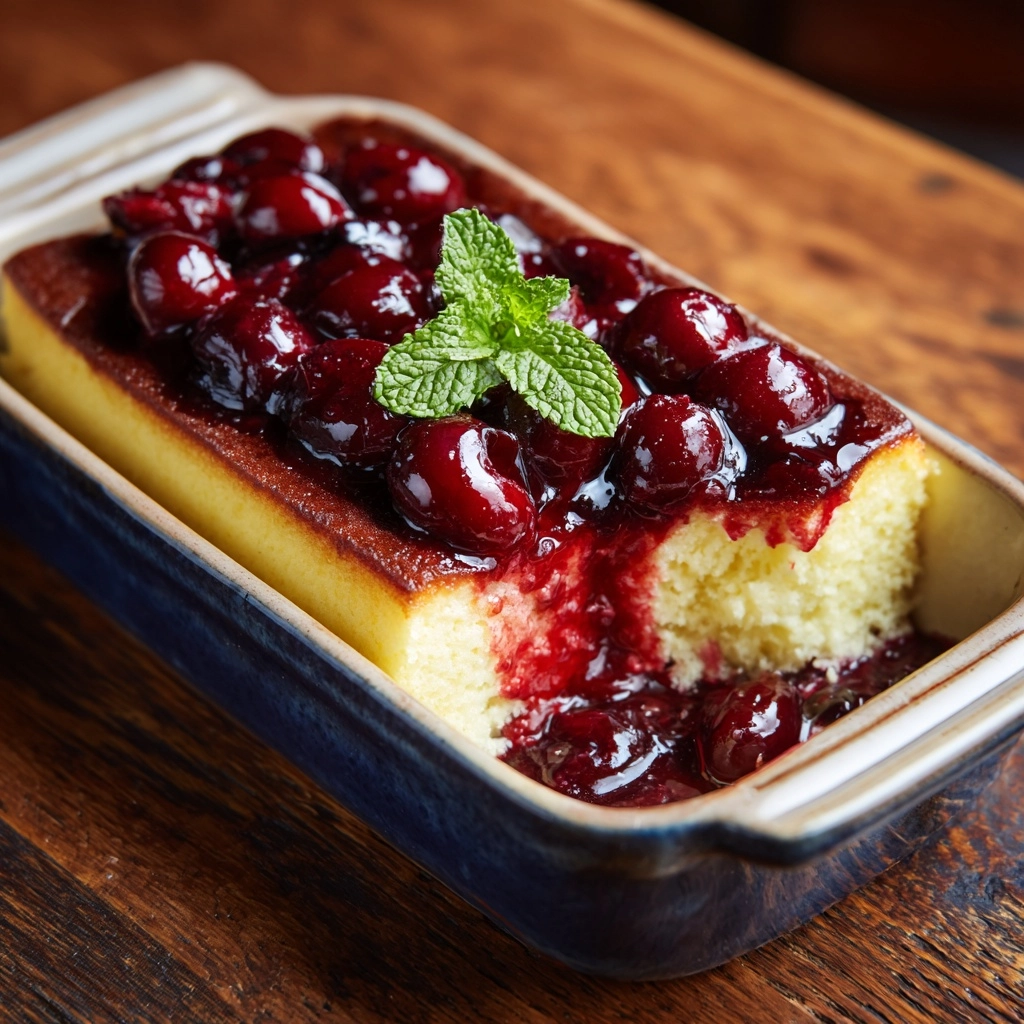
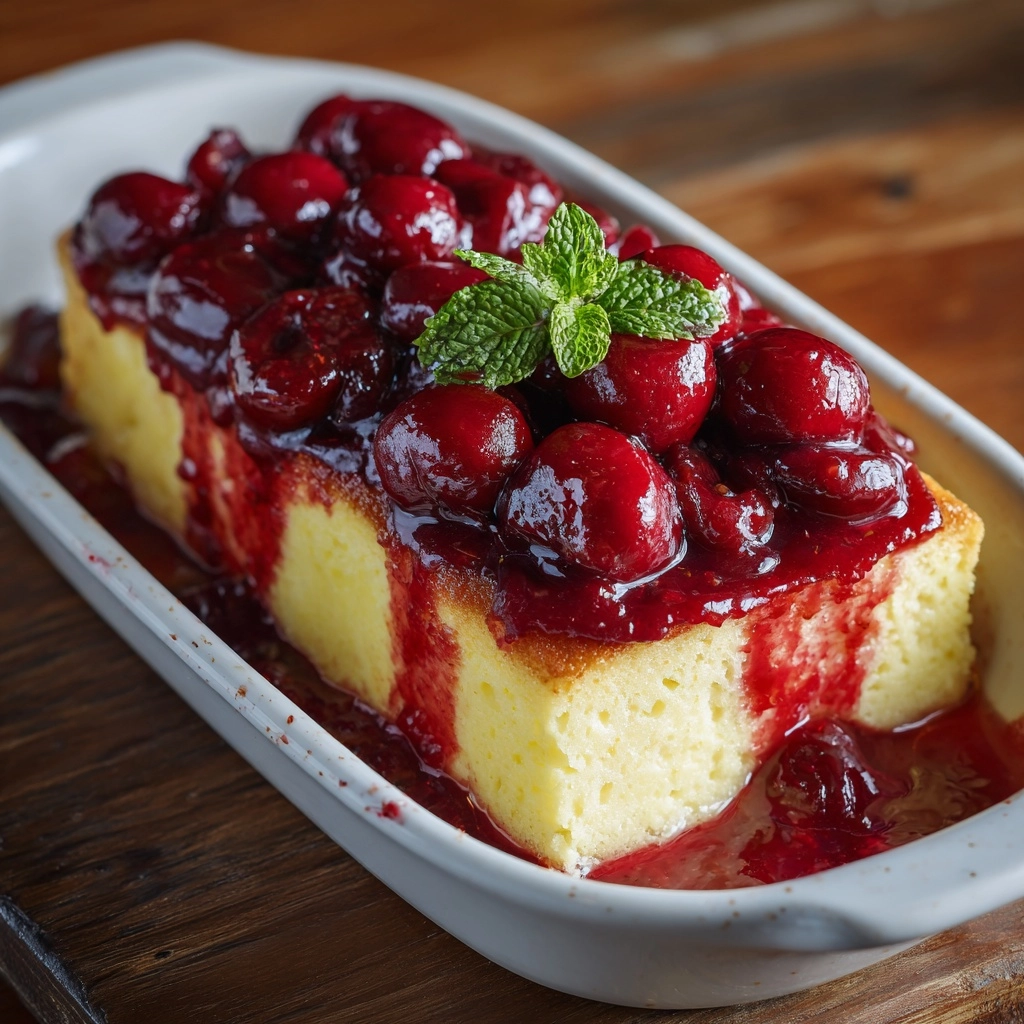
If there was ever a dessert guaranteed to win hearts at any gathering, it’s Classic Cherry Delight. This iconic layered treat is beloved for its buttery graham cracker crust, cloud-like creamy filling, and a crown of vibrant cherry topping. It’s the sort of feel-good, retro dessert that brings everyone together, whether you’re celebrating a big holiday or simply indulging in a sweet weeknight treat. Every bite is cheerful, nostalgic, and simply irresistible, making this Classic Cherry Delight a must-have recipe for your dessert repertoire!
Ingredients You’ll Need
The magic of Classic Cherry Delight lies in its handful of simple yet essential ingredients. Each one plays an important role, from the crispy crust to the creamy layer and the burst of cherry sweetness on top.
- Graham cracker crumbs: These form the base, delivering a buttery, crunchy counterpoint to the creamy center.
- Granulated sugar: Adds just the right amount of sweetness to the crust, helping it come together perfectly.
- Unsalted butter (melted): Binds the crumbs and sugar while lending a rich flavor.
- Cream cheese (softened): The heart of the creamy layer, providing a tangy, luscious texture.
- Powdered sugar: Melts seamlessly into the cream cheese, creating a smooth, sweet filling.
- Vanilla extract: Enhances the flavor of the filling with warm, fragrant notes.
- Whipped topping (thawed): Makes the filling light and airy, giving that signature fluffiness.
- Cherry pie filling: The star of the show, with glossy cherries offering a sweet-tart finish and irresistible color.
How to Make Classic Cherry Delight
Step 1: Prepare the Graham Cracker Crust
Start by preheating your oven to 350°F. In a mixing bowl, combine the graham cracker crumbs, granulated sugar, and melted butter. Use a fork or your hands to thoroughly mix until the texture resembles wet sand. This mixture should clump together when squeezed, which means it’s ready to go. Press it firmly and evenly into the bottom of a 9×13-inch baking dish to form a solid base. For a firmer, more flavorful crust, pop it in the oven and bake for 8–10 minutes, then let it cool completely before moving on.
Step 2: Whip Up the Creamy Filling
While your crust is cooling, grab a clean mixing bowl and beat the softened cream cheese until velvety smooth—no lumps, please! Add the powdered sugar and pure vanilla extract, and continue mixing until thoroughly combined. Gently fold in the thawed whipped topping. Take care to incorporate it without deflating the mixture; you want the filling super light and fluffy.
Step 3: Assemble and Layer
Once the crust is completely cool, spread the cream cheese mixture over it in an even layer. Use an offset spatula or the back of a spoon to smooth the surface, making sure every corner is covered. Next, carefully spoon the cherry pie filling over the cream layer, spreading it out so the cherries glisten across the dessert. Each layer should be distinct and tempting.
Step 4: Chill to Perfection
Patience is key! Cover the dish with plastic wrap and refrigerate for at least 4 hours—or overnight, if you can wait. This chill time sets the layers, making Classic Cherry Delight wonderfully sliceable and giving the flavors time to meld together. The anticipation will be well worth it!
How to Serve Classic Cherry Delight

Garnishes
To make your Classic Cherry Delight truly irresistible, try adding some finishing touches before serving. A dollop of whipped cream, a dusting of extra graham crumbs, or a couple of fresh mint leaves can instantly elevate the presentation and flavor. You can even add a few chocolate shavings for a bit of decadence!
Side Dishes
This dessert shines as a sweet finale after a lighter meal, like grilled chicken or a crisp summer salad. If you’re hosting a potluck or party, consider serving Classic Cherry Delight alongside fruit salad, lemon bars, or a platter of shortbread cookies for a spread of irresistible sweets.
Creative Ways to Present
There’s no rule that says you have to make Classic Cherry Delight in a large dish. Try assembling it in individual mason jars or parfait glasses for personal-sized portions, perfect for picnics or special occasions. You could even turn this dessert into mini tarts using the same components for an adorable twist!
Make Ahead and Storage
Storing Leftovers
If you’re lucky enough to have leftovers, simply cover the baking dish tightly with plastic wrap or foil and store it in the refrigerator. The flavors actually deepen over a day or two, making Classic Cherry Delight even more delicious the next time around. Just remember to consume within 4 days for the best taste and texture.
Freezing
Classic Cherry Delight freezes surprisingly well! For best results, slice the chilled dessert into portions and wrap them individually in plastic wrap, then place the portions in a freezer-safe container. You can freeze for up to 2 months. Before serving, transfer the slices to the fridge and let them thaw overnight—this helps prevent any sogginess.
Reheating
This dessert is best enjoyed chilled, so there’s no need to reheat. In fact, Classic Cherry Delight shines its brightest straight from the fridge! If you prefer a slightly softer texture, let it sit at room temperature for 10–15 minutes before serving.
FAQs
Can I use homemade cherry topping instead of canned?
Absolutely! If you have fresh cherries or prefer to make your own topping, just simmer pitted cherries with a bit of sugar and cornstarch until thick and glossy. Let it cool completely before adding it to your Classic Cherry Delight for a personal touch.
What’s the benefit of baking the crust versus chilling?
Baking the graham cracker crust gives it a toasted, more robust flavor and a sturdier texture. If you’re short on time, chilling the crust will work, but be aware that it may be a bit more crumbly when you cut into your Classic Cherry Delight.
Can I make this dessert with different pie fillings?
Definitely! While cherry is traditional, you can experiment with blueberry, strawberry, or even peach pie fillings. Just follow the same layering steps and let your creativity shine in your take on Classic Cherry Delight.
Is there a lower-fat version?
Yes! Substitute low-fat cream cheese and light whipped topping for a lower-fat Classic Cherry Delight. The final dessert will still be creamy and luscious, with slightly fewer calories to ease your mind.
Can I assemble this recipe in advance for a party?
Classic Cherry Delight is actually at its best when made ahead. The chilling time allows the layers to set beautifully and the flavors to meld. Prepare it the night before your gathering for effortless serving on the big day!
Final Thoughts
This crowd-pleasing Classic Cherry Delight is the kind of recipe that’s just as fun to make as it is to share. Whether it’s for a holiday, a potluck, or simply because you want to treat yourself, every layer is full of comfort and cheer. I hope you’ll gather your loved ones and whip up this delightful classic soon—it’s sure to become a staple on your dessert table!