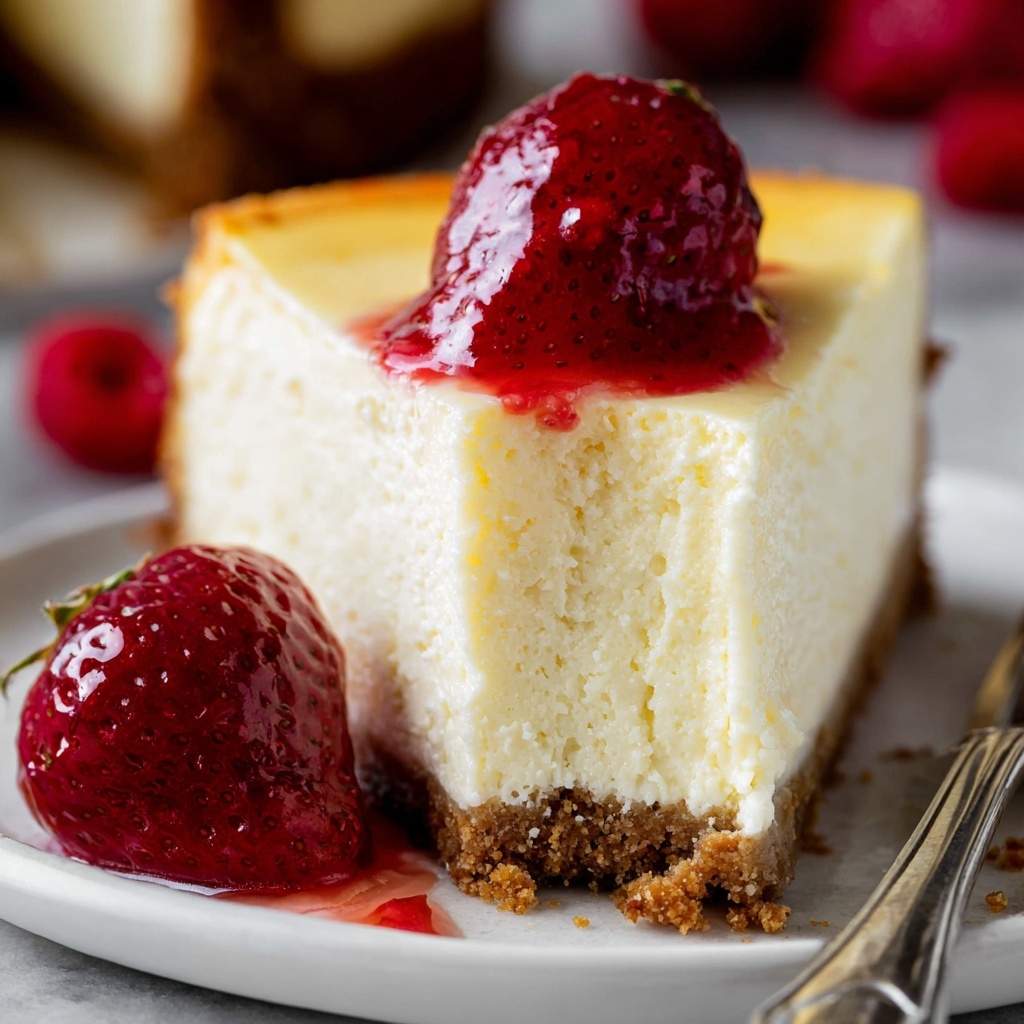
If you have ever dreamed of a dessert that combines silky smoothness with a perfectly buttery crunch, this Classic Baked Cheesecake with Graham Cracker Crust Recipe is your culinary soulmate. It’s a timeless favorite that never disappoints—rich, creamy cheesecake nestled atop a nutty, browned butter graham cracker crust that adds a delightful depth of flavor. This recipe walks you through every step to achieve that ideal balance of tangy, sweet, and buttery notes, making it a standout centerpiece for any occasion. Whether you’re a seasoned baker or just diving into cheesecake territory, this is one recipe you’ll cherish and come back to again and again.
Ingredients You’ll Need
Believe me, the beauty of this Classic Baked Cheesecake with Graham Cracker Crust Recipe lies in the simplicity and quality of its ingredients. Each component plays a vital role, whether it’s the creamy tang from full-fat cream cheese and sour cream or the buttery richness from browned butter. Together, they create that dreamy texture and unforgettable flavor.
- 1/2 cup butter (1 stick): You’ll brown it for an irresistibly nutty crust flavor.
- 18 full graham cracker sheets (about 2 cups crumbs): The classic base that gives your crust its signature crispness.
- 1/4 cup granulated sugar: Sweetens the crust perfectly.
- 1/2 teaspoon kosher salt: Balances the sweetness and enhances flavor.
- 3/4 cup full-fat sour cream: Adds creaminess and a subtle tang to the filling.
- 3 large eggs + 1 egg yolk: Vital for structure and silky texture.
- 2 teaspoons vanilla extract: Brings a warm, rich aroma to the cheesecake.
- 1 1/2 tablespoons lemon juice (about half a lemon): A touch of brightness to lift the flavor.
- 4 (8-ounce) packages full-fat cream cheese: The star ingredient for creamy, luscious cheesecake—Philadelphia brand is highly recommended!
- 2 cups granulated sugar: Sweetens the cheesecake just right.
How to Make Classic Baked Cheesecake with Graham Cracker Crust Recipe
Step 1: Soften the Cream Cheese and Eggs
Starting with room temperature ingredients is key to a smooth cheesecake batter. Let your cream cheese soften at room temperature for at least an hour or two—this patience avoids those pesky lumps. The eggs should also warm up alongside the cream cheese for even mixing. Although microwaving might speed things up, the uneven softening can cause trouble later, so waiting is best.
Step 2: Brown the Butter for the Crust
Browned butter is a game-changer. Melt the butter over medium heat, stirring until it foams and the milk solids brown. The rich, toffee-like aroma that fills your kitchen is a sure sign you’re on the right track. Make sure to watch closely to prevent burning—this step adds amazing depth to your graham cracker crust.
Step 3: Prepare and Bake the Graham Cracker Crust
Once your browned butter is cooled for about 30 minutes, crush the graham crackers finely using a food processor or rolling pin in a sealed bag. Toss in sugar and salt, then stir in the browned butter until crumbs are evenly moistened. Press the mixture firmly into a 9-inch springform pan, making sure to push it up the sides by at least an inch—you want a sturdy crust that won’t crumble when slicing. Bake at 325°F for 12 minutes and let cool completely.
Step 4: Brown the Butter for the Cheesecake Filling
Using the same pot, brown another stick of butter following the same instructions as before for the crust. This browned butter will add a warm, nutty richness to the cheesecake, elevating the filling’s flavor wonderfully. Set it aside to cool while you prepare the rest of the filling.
Step 5: Mix the Sour Cream and Egg Mixture
In a large bowl or your stand mixer, whisk together sour cream, eggs, egg yolk, vanilla, lemon juice, and a pinch of salt for at least 2 minutes. Scrape the sides often and keep an eye out for any undissolved egg solids—remove any you find to keep your batter silky smooth. This mixture brings a beautiful tang and lightness to your cheesecake.
Step 6: Add the Browned Butter to the Sour Cream Mixture
Slowly pour the cooled browned butter into the sour cream and egg mixture while beating on low speed to avoid scrambling the eggs. This step infuses the filling with that irresistible nutty scent and creamy texture.
Step 7: Beat the Cream Cheese and Sugar
In your mixer bowl, whip the softened cream cheese until absolutely smooth—no lumps allowed! Add the sugar and beat just until combined to avoid too much air incorporation which can cause cracks later. The creaminess here is fundamental to the luxurious mouthfeel of your cheesecake.
Step 8: Combine the Cream Cheese and Sour Cream Mixtures
Pour the sour cream and butter mixture into the cream cheese and sugar bowl. Beat gently until just combined, carefully eliminating any lumps. This union results in the silky, rich batter that your classic baked cheesecake simply must have.
Step 9: Pour Batter into Crust and Remove Air Bubbles
Transfer the batter into your cooled crust. Don’t worry if it fills or slightly overflows the crust edges; you can smooth it out easily. To get rid of trapped air bubbles, lift the springform pan about an inch above your counter and drop it down a few times. Then wait for 10 minutes, poking any surfaced bubbles with a toothpick—it’s a small effort that guarantees a flawless texture.
Step 10: Bake the Cheesecake Using the Steam Method
To keep your cheesecake moist and crack-free, we’re baking it with steam. Place a metal 9×13 inch pan on the bottom rack and heat water to a rolling boil. Position the cheesecake on the center oven rack (oven heated to 325°F), pour the boiling water into the pan underneath to about halfway up the sides, and put the rack back quickly. Bake unopened for 70 minutes. This gentle heat cooks your cake perfectly.
Step 11: Cool Cheesecake Gradually in the Oven
Turn off the oven after 70 minutes but do not open the door. Let your cheesecake rest inside the cooling oven for at least 4 hours or preferably overnight to finish baking slowly and prevent cracks. Once cooled to room temperature, chill it in the fridge for another 4 to 8 hours before serving.
Step 12: Unmold and Slice
When fully chilled, carefully remove the springform pan. Use a sharp knife, wiped between cuts, to slice neat portions. The result is a creamy, luscious cheesecake with a golden edges and that wonderfully crunchy browned butter graham cracker crust you will love!
How to Serve Classic Baked Cheesecake with Graham Cracker Crust Recipe
Garnishes
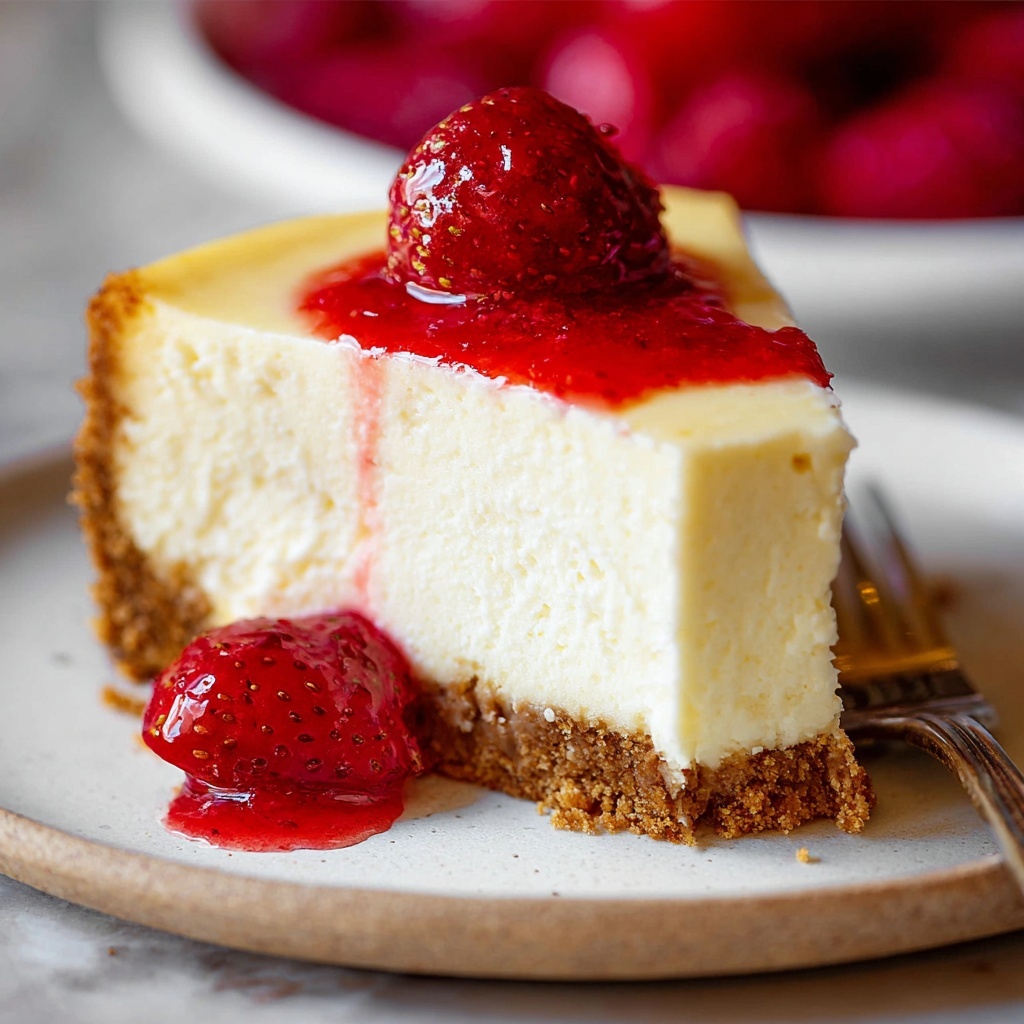
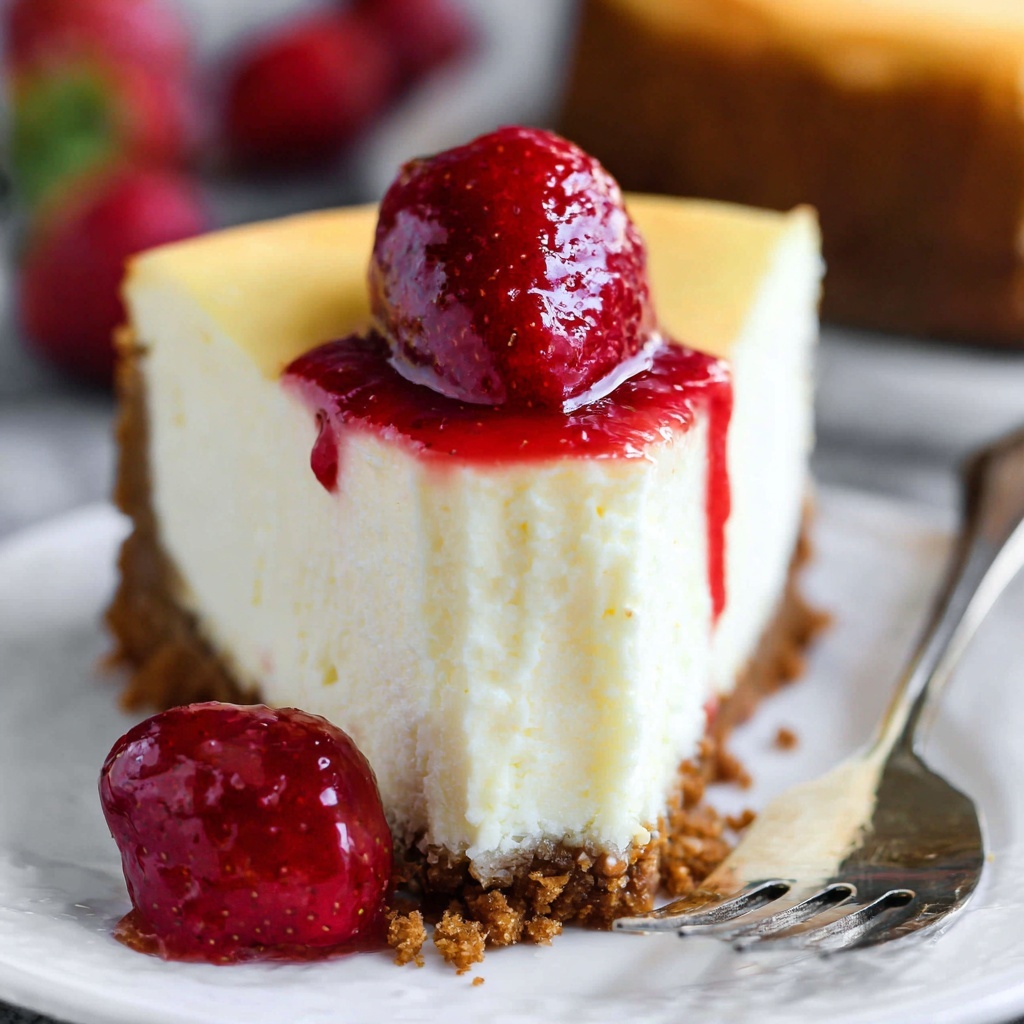
Simple additions can elevate your cheesecake beautifully. Fresh berries like raspberries or strawberries add a fresh burst and a pop of color. For a richer touch, drizzle homemade lemon curd, salted caramel, or a silky chocolate ganache. A sprinkle of flaky sea salt on caramel toppings creates a perfect balance of sweet and savory that tingles your tastebuds.
Side Dishes
Think light and complementary. A scoop of vanilla bean ice cream or a dollop of freshly whipped cream pairs perfectly with the tangy richness. For something special, serve alongside a fruit compote or a vibrant cranberry sauce to add a holiday twist or seasonal flair.
Creative Ways to Present
Why not impress your loved ones by presenting your cheesecake in mini springform pans or individual jars for a fun twist? Or, try layering slices with fruit and crème fraîche for a deconstructed cheesecake parfait. For festive occasions, rim the serving plate with crushed graham crackers or edible gold dust for a stunning presentation.
Make Ahead and Storage
Storing Leftovers
Cover your cheesecake in the refrigerator to keep it fresh for 2 to 3 days. The crust is best enjoyed within this period before it begins to soften. Keeping it uncovered initially during chilling helps prevent condensation, but afterward, wrap it loosely with plastic wrap to maintain moisture.
Freezing
If you want to make this cheesecake ahead of time or preserve leftovers longer, freezing is a fantastic option. Wrap the whole cheesecake tightly in plastic wrap and then multiple layers of aluminum foil. Freeze for up to 3-4 months. For individual slices, flash freeze on a pan before wrapping to keep them separate, then thaw in the refrigerator for 12-24 hours before serving.
Reheating
Cheesecake is best enjoyed chilled, but if you prefer it slightly warmed, let it sit at room temperature for about 20 minutes before serving to bring out the flavors. Avoid microwaving as this can change texture adversely.
FAQs
Can I use a different type of crust instead of graham cracker?
Absolutely! While the graham cracker crust gives the classic flavor, you can experiment with crushed digestive biscuits, gingersnaps, or even Oreo crumbs for a unique twist.
Why does my cheesecake crack on top?
Cracks often form from overbeating the batter, baking at too high a temperature, or rapid cooling. Following this recipe’s slow baking and cooling with steam helps prevent cracks and ensures a smooth surface.
Can I make this cheesecake gluten-free?
Yes, just substitute the graham crackers for your favorite gluten-free crumbs. Make sure your other ingredients are certified gluten-free to avoid contamination.
Is it okay to skip browning the butter?
You can skip browning, but you’ll miss out on that deep, nutty flavor that makes this recipe so special. It’s a small extra step that makes a big difference!
How do I know when the cheesecake is done?
The center should still have a slight wobble when you gently shake the pan after baking. It will finish setting as it cools in the oven and fridge, resulting in a creamy but firm texture.
Final Thoughts
Once you master this Classic Baked Cheesecake with Graham Cracker Crust Recipe, you’ll have a trusted dessert that feels both elegant and comforting. It’s a true crowd-pleaser with flavors that sing harmony together—rich cream cheese, tangy sour cream, zesty lemon, and unbelievably delicious browned butter crust. So preheat your oven, gather those simple ingredients, and dive into making a cheesecake that will quickly become a beloved staple in your kitchen.