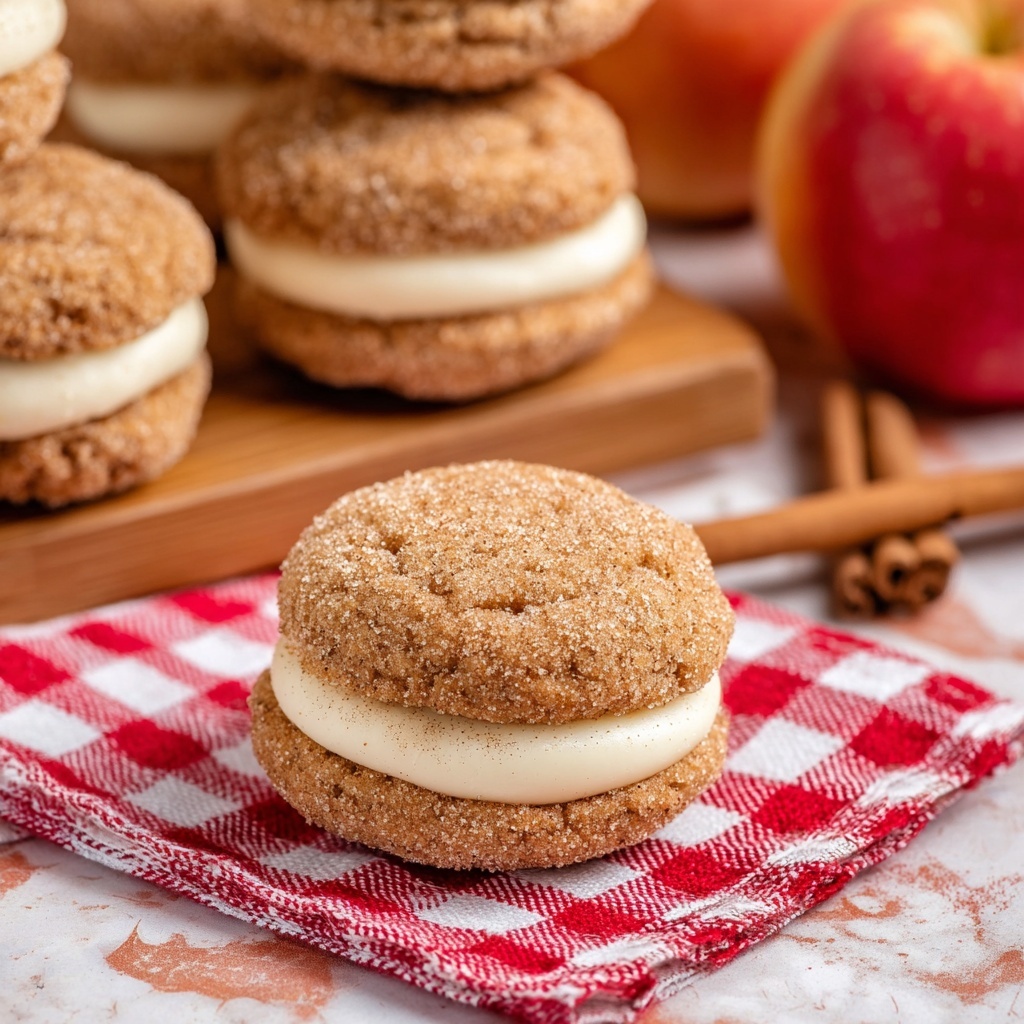
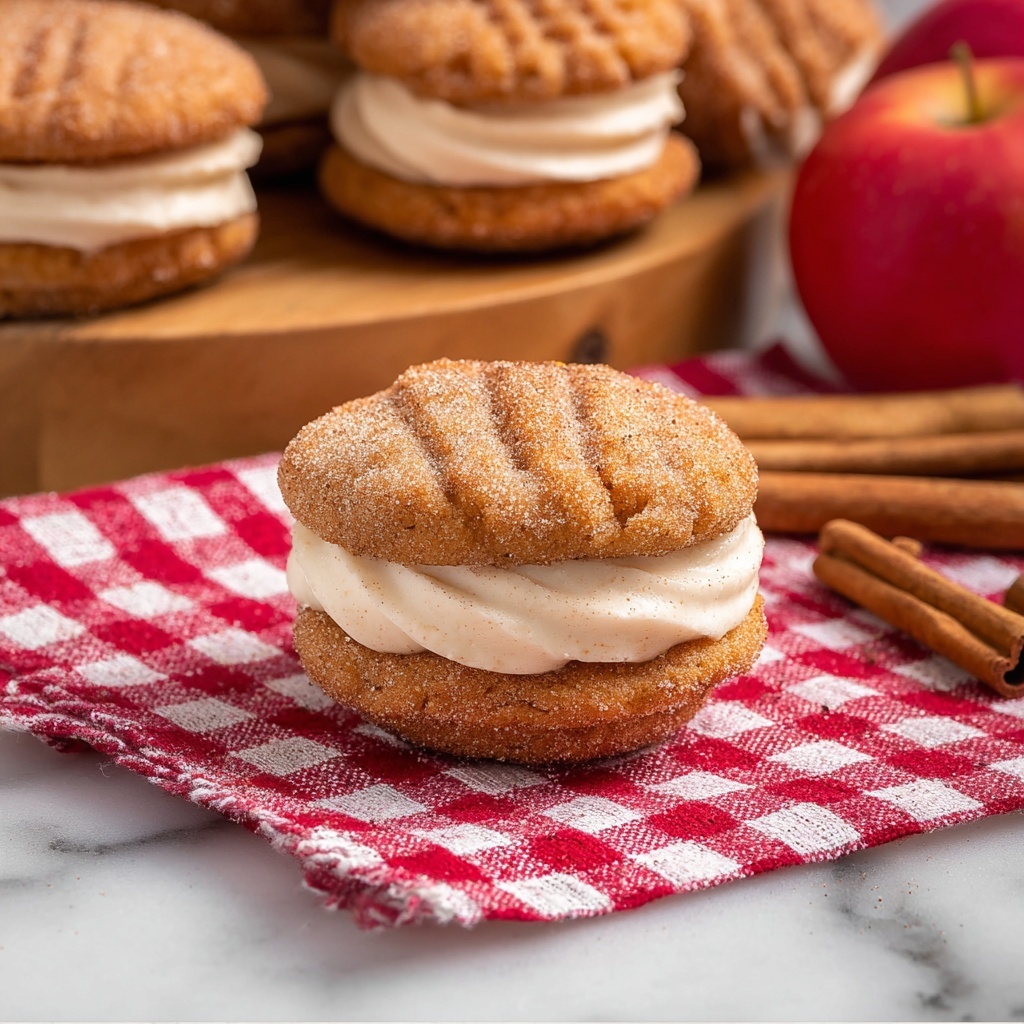
If you love flavors of fall wrapped up in a soft, pillowy treat, you are absolutely going to adore this Apple Cider Whoopie Pies Recipe. These whoopie pies deliver the perfect harmony of warm spices, tangy apple cider, and buttery sweetness all sandwiched between tender cake-like rounds with a luscious, creamy filling. It’s a nostalgic bite of cozy autumn days that’s irresistibly satisfying and downright comforting. Every time I make this recipe, I’m reminded why it’s a beloved classic with a fresh, seasonal twist that always steals the show at gatherings or simply brightens an afternoon snack.
Ingredients You’ll Need
These ingredients are simple yet essential, each playing a special role in bringing out the deep, cozy flavor and perfect texture of the Apple Cider Whoopie Pies Recipe. From the rich spices that make your kitchen smell heavenly to the creamy filling that balances every bite, every item on this list is a flavor champion.
- Apple cider (2½ cups): Reduced down for concentrated, sweet-tart apple flavor that gives the cakes a moist, tender texture.
- All-purpose flour (3 cups): The base of our whoopie pies, giving structure and a soft crumb.
- Baking powder (2 teaspoons): Helps the cakes rise and become delightfully fluffy.
- Kosher salt (1 teaspoon): Enhances all the flavors and balances the sweetness perfectly.
- Baking soda (½ teaspoon): Adds just the right bit of lift and helps with browning.
- Ground cinnamon (2 teaspoons + 1 teaspoon): Adds warmth and a signature spiced note to both the cakes and topping.
- Ground ginger (1 teaspoon): Provides a gentle kick and depth to the spice blend.
- Ground nutmeg (1 teaspoon): Delivers a subtle, nutty spice that makes this recipe feel cozy and traditional.
- Unsalted butter, softened (¾ cup + ½ cup + 4 tablespoons melted): Key for tender cakes and rich, creamy filling – plus, a coating for sugar topping.
- Dark brown sugar (1 cup + ¼ cup): Adds deep molasses undertones that complement the apple cider beautifully.
- Large eggs (2): Bind everything together and add moisture.
- Apple butter (½ cup): Brings an extra layer of apple sweetness and flavor into the batter.
- Granulated sugar (½ cup): Mixed with cinnamon for a gently crunchy sugar coating on the cakes’ tops.
- Powdered sugar (2 cups): Creates the silky-smooth, sweet filling.
- Vanilla extract (1 teaspoon): Adds a cozy, fragrant sweetness to the filling.
- Heavy cream (2 teaspoons): Lightens the filling giving it a perfect, fluffy texture.
How to Make Apple Cider Whoopie Pies Recipe
Step 1: Prepare baking and reduce cider
Start by heating your oven to a warm 350°F and lining a baking sheet with parchment paper—this helps the pies come off cleanly and maintain their shape. Next, simmer your apple cider in a saucepan over medium-high heat until it’s thickened to about ¼ cup. This reduction packs a punch of concentrated apple flavor that transforms your whoopie pies from ordinary to extraordinary. Cool it down so it won’t scramble your eggs later in the batter.
Step 2: Mix dry ingredients
In a medium bowl, whisk together all the dry ingredients: flour, baking powder, kosher salt, baking soda, cinnamon, ginger, and nutmeg. This step ensures your spices and leavening agents are evenly distributed so every bite bursts with balanced flavor and the cakes rise just right.
Step 3: Cream butter and sugar
In a large mixing bowl or stand mixer, cream the softened butter and dark brown sugar until light and fluffy—this process is crucial as it traps air, helping your cakes turn out tender and delicate. Scrape down the sides as you mix so everything is incorporated perfectly.
Step 4: Add eggs, apple butter, and cider reduction
Beat in the eggs one at a time, followed by the apple butter and the cooled apple cider reduction. Your batter might look a little curdled or separated here, but that’s normal and won’t affect the final texture—just keep mixing gently.
Step 5: Combine wet and dry ingredients
Fold the dry mixture into the wet ingredients until just combined, being careful not to overmix so you don’t develop the gluten too much. Your batter should be thick but scoopable, ready for baking.
Step 6: Scoop and bake
Use a medium cookie scoop to portion out the dough onto your prepared baking sheet, leaving about 2 inches in between for spreading. Bake for 10 to 14 minutes, rotating halfway to ensure even cooking, until the cakes puff up, are set, and spring back lightly to the touch.
Step 7: Add cinnamon sugar topping
While the cakes are warm, brush their tops with melted butter then gently toss them in a cinnamon and granulated sugar mix, avoiding the flat bottom to keep the filling sticking well later. Allow them to cool completely on a wire rack before filling.
Step 8: Prepare the filling and assemble
Whip the softened butter and brown sugar until fluffy, then gradually add powdered sugar, mixing just until blended. Beat in vanilla and heavy cream until the frosting is light and creamy. Pipe about 2 tablespoons of this luscious filling onto the flat side of half your cakes, then sandwich with the other halves, pressing gently to seal.
How to Serve Apple Cider Whoopie Pies Recipe

Garnishes
Want to make these whoopie pies look as stunning as they taste? Sprinkle a little extra cinnamon sugar on top just before serving or add a delicate dusting of powdered sugar. For an elegant touch, add a tiny cinnamon stick or a thin apple slice on the side to hint at the flavors inside.
Side Dishes
Apple Cider Whoopie Pies shine on their own but pairing them with a warm cup of chai tea, spiced apple cider, or a classic hot chocolate takes the experience to a whole new level. You can also serve them with fresh apple slices or a scoop of vanilla ice cream for extra indulgence.
Creative Ways to Present
Try stacking a few whoopie pies on a rustic wooden board for a charming fall dessert display or wrap them individually in parchment and tie with twine for sweet grab-and-go treats at parties. They also make adorable gifts when packaged in pretty boxes with a seasonal ribbon.
Make Ahead and Storage
Storing Leftovers
If you have leftovers, store the whoopie pies in an airtight container in the refrigerator for up to 3 days. This helps keep the cakes soft and the filling fresh while preventing any drying out.
Freezing
You can freeze assembled Apple Cider Whoopie Pies Recipe for up to a month. Wrap each pie individually in plastic wrap, then place in a freezer-safe bag or container. Thaw in the fridge overnight before serving to retain their delightful texture.
Reheating
Reheat leftovers gently by popping the pies in the microwave for about 10 seconds to bring back some softness without melting the filling too much. Avoid overheating as it may cause the whoopie pies to become dry or the filling to lose its fluffiness.
FAQs
Can I use regular apple juice instead of apple cider?
While regular apple juice is sweeter and less spiced, it can be used in a pinch. However, the rich, tart flavor from traditional apple cider makes a big difference in the overall taste of these whoopie pies.
Is there a gluten-free option for this recipe?
Absolutely! Substitute the all-purpose flour with a gluten-free baking blend that includes xanthan gum to mimic the texture and binding properties. The spices and cider reduction will remain just as flavorful.
How do I know when the whoopie pies are done baking?
They should be puffed, set, and spring back lightly when you gently press the tops with your finger. The edges will look firm but the cakes remain soft and moist inside.
Can I make the filling dairy-free?
Yes! Use a dairy-free butter substitute and a suitable non-dairy milk or cream alternative to maintain creaminess. The texture might vary slightly but the flavors will be just as delicious.
What’s the best way to pipe the filling evenly?
A piping bag fitted with a round tip works best for the filling. It helps you control the amount and placement, giving you neat, consistent whoopie pies every time.
Final Thoughts
This Apple Cider Whoopie Pies Recipe is one of those magical fall treats that feels like a warm hug with every bite. Its blend of spicy warmth, apple goodness, and creamy filling makes it perfect for sharing with family or gifting to friends. I truly hope you give this recipe a try soon—you won’t regret adding this cozy, scrumptious dessert to your seasonal favorites.