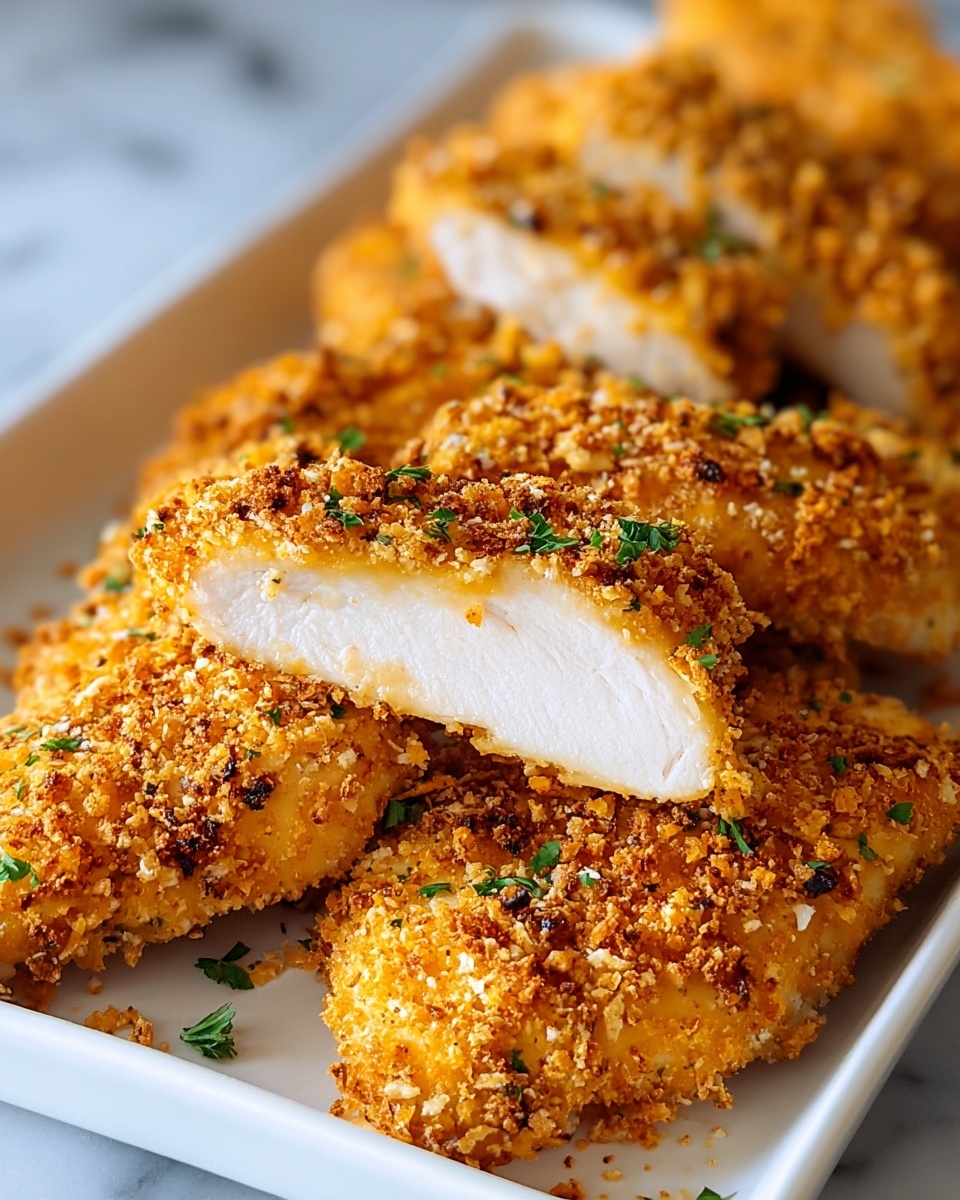
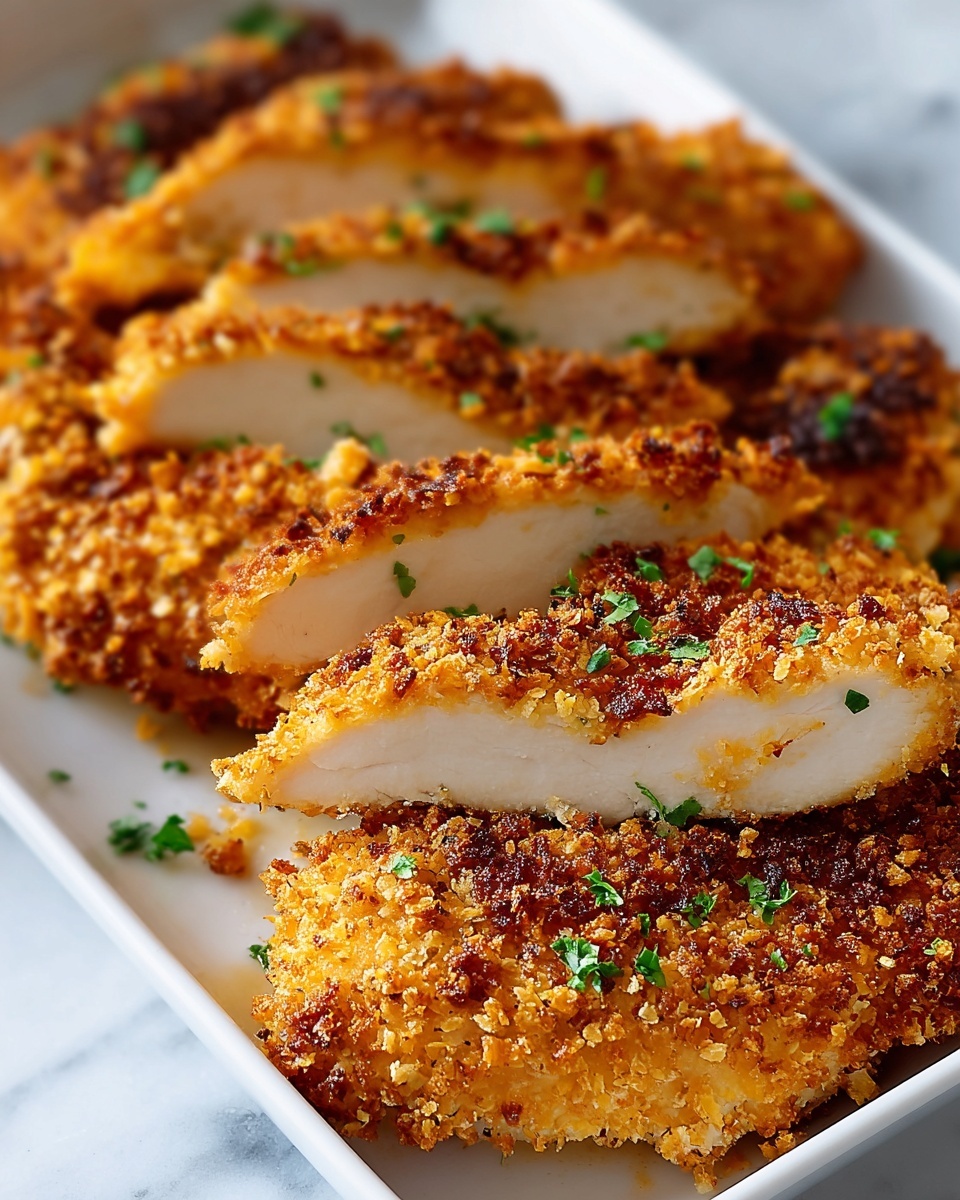
If you have been on the lookout for a deliciously crunchy, healthier alternative to fried chicken, then you absolutely need to try this Crispy Baked Chicken Tenders Recipe. It’s a fantastic way to enjoy tender, juicy chicken coated in a golden, flavorful crust without the hassle of deep frying. From the first bite, you’ll appreciate how the panko crumbs and Parmesan cheese create that perfect crispy texture, combined with a hint of smoky paprika and garlic that makes every strip irresistibly tasty. Whether you’re feeding the family on a busy weeknight or craving a satisfying snack, this recipe is bound to become a favorite go-to that’s simple, quick, and downright delicious.
Ingredients You’ll Need
To make this Crispy Baked Chicken Tenders Recipe shine, you don’t need a long list of fancy ingredients—just a handful of kitchen staples that each play a crucial role, from adding crunch and flavor to ensuring the tenders bake up perfectly golden and tender.
- Chicken tenders or chicken breast (1 lb / 450g): The star of the dish, providing tender, juicy meat that cooks quickly.
- Panko breadcrumbs (1 cup): Gives that unmistakable light, airy crispiness that makes these tenders stand out.
- Grated Parmesan cheese (1/2 cup): Adds savory depth and helps with browning for extra flavor and color.
- Smoked paprika (1 tsp): Imparts a subtle smoky note that complements the chicken beautifully.
- Garlic powder (1/2 tsp): Infuses a gentle garlic essence for a balanced taste.
- Onion powder (1/2 tsp): Enhances the overall flavor profile with sweet onion undertones.
- Salt and pepper (to taste): Essential seasonings to elevate every bite.
- All-purpose flour (1/2 cup): Helps the egg wash adhere for that perfect breading.
- Eggs (2 large, beaten): Acts as the glue between the flour and the breadcrumb coating.
- Olive oil spray: Ensures the tenders bake to crispy perfection without being greasy.
How to Make Crispy Baked Chicken Tenders Recipe
Step 1: Prepare Your Oven and Baking Sheet
Start things off by preheating your oven to 400°F (200°C) and lining a baking sheet with parchment paper. Give the parchment a light spray of olive oil so the chicken tenders won’t stick and will crisp nicely on all sides. This simple step sets you up for an easy clean-up and ensures the tenders remain intact after baking.
Step 2: Set Up Your Breading Station
This is where the magic begins! Arrange three shallow dishes: one with the flour, one with beaten eggs, and a third with a perfectly mixed blend of panko breadcrumbs, Parmesan cheese, smoked paprika, garlic powder, onion powder, salt, and pepper. This organized setup will make coating each chicken strip a breeze and help maintain consistency in flavor and crunch.
Step 3: Coat the Chicken
Gently pat your chicken tenders dry with paper towels to remove excess moisture—this helps the coating stick better. First, dredge each piece in flour, shake off the excess, then dip into the beaten eggs. Next, press the chicken into the breadcrumb mixture thoroughly, making sure every tender is well covered with that golden, yummy crust.
Step 4: Arrange and Spray
Place each breaded chicken tender on your prepared baking sheet, keeping a little space between them for even cooking. Now, give the tops a light spray of olive oil. This step is crucial because it helps the coating bake up crispy and golden without needing deep frying or messy oil baths.
Step 5: Bake to Perfection
Bake the tenders for 18 to 20 minutes, flipping them halfway through the cooking time. This flip ensures both sides get that irresistible crunch and beautiful golden color. Your tenders are perfectly cooked when they reach an internal temperature of 165°F (74°C), delivering juicy chicken with a crispy crust every single time.
Step 6: Serve and Enjoy
Once your Crispy Baked Chicken Tenders Recipe is out of the oven, serve them immediately to enjoy the full crunch and fresh flavor. Pair with your favorite dipping sauces for a crowd-pleasing meal that everyone will love.
How to Serve Crispy Baked Chicken Tenders Recipe

Garnishes
Fresh herbs like chopped parsley or cilantro sprinkled on top add a lovely pop of color and freshness that brightens the dish. A squeeze of lemon juice can also cut through the richness, lending a zesty balance that makes each bite more vibrant. Don’t forget a pinch of flaky sea salt right after baking to enhance the flavors even more.
Side Dishes
Perfect pairings for these chicken tenders include crispy roasted potatoes, a fresh garden salad with a tangy vinaigrette, or even steamed veggies for a wholesome meal. For something fun and casual, serve them alongside creamy mac and cheese or a crunchy coleslaw to round out the textures beautifully.
Creative Ways to Present
Present these tenders stacked on a platter or arranged around a bowl of your favorite dipping sauces like honey mustard, ranch, or BBQ sauce. You could even make a fun “build-your-own” chicken tender wrap station with tortillas, shredded lettuce, diced tomatoes, and cheese, letting everyone customize their meal while staying crispy and delightful!
Make Ahead and Storage
Storing Leftovers
After enjoying your meal, any leftover crispy baked chicken tenders can be stored in an airtight container in the refrigerator for up to 3 days. Make sure to let them cool completely before storing to preserve crispiness and keep them tasting fresh the next day.
Freezing
If you want to save some for later, the tenders freeze incredibly well. Place them on a baking sheet to freeze individually first, then transfer to a freezer-safe bag or container. They’ll keep perfectly for up to 2 months. This way, you can enjoy the convenience of having a quick, crispy chicken option any time you want!
Reheating
To bring back that fresh-out-of-the-oven crunch, reheat your leftovers in a preheated oven at 375°F (190°C) for 10-12 minutes or until heated through and crispy again. Avoid microwaving if possible, as it tends to make the coating soggy.
FAQs
Can I use chicken breasts instead of tenders?
Absolutely! Just slice the chicken breasts into strips about the size of tenders before breading and baking. The cooking time remains roughly the same.
What if I don’t have panko breadcrumbs?
Regular breadcrumbs can work, but panko is preferred because it’s lighter and crispier. You might get a slightly different texture, but the tenders will still be tasty.
Can I make this recipe gluten-free?
Yes! Substitute the all-purpose flour and breadcrumbs with gluten-free alternatives. Make sure to check that the Parmesan and seasonings are also gluten-free for a safe option.
Is it necessary to flip the tenders halfway through baking?
Flipping helps both sides brown evenly and get crispy, but if you’re using a convection oven or a wire rack, it might not be essential. Just keep an eye on the tenders to avoid overcooking.
What dipping sauces go best with these chicken tenders?
Classic choices like honey mustard, ranch, and BBQ sauce complement the flavors perfectly. You can also try spicy sriracha mayo or even a fresh avocado dip for a fun twist.
Final Thoughts
I cannot recommend this Crispy Baked Chicken Tenders Recipe enough for anyone wanting a crunchy, flavorful chicken dish without the mess or guilt of frying. It’s simple, packed with flavor, and so satisfying that you’ll find yourself reaching for it time and again. Give it a try, and trust me, these tenders will quickly become a beloved staple at your dinner table.