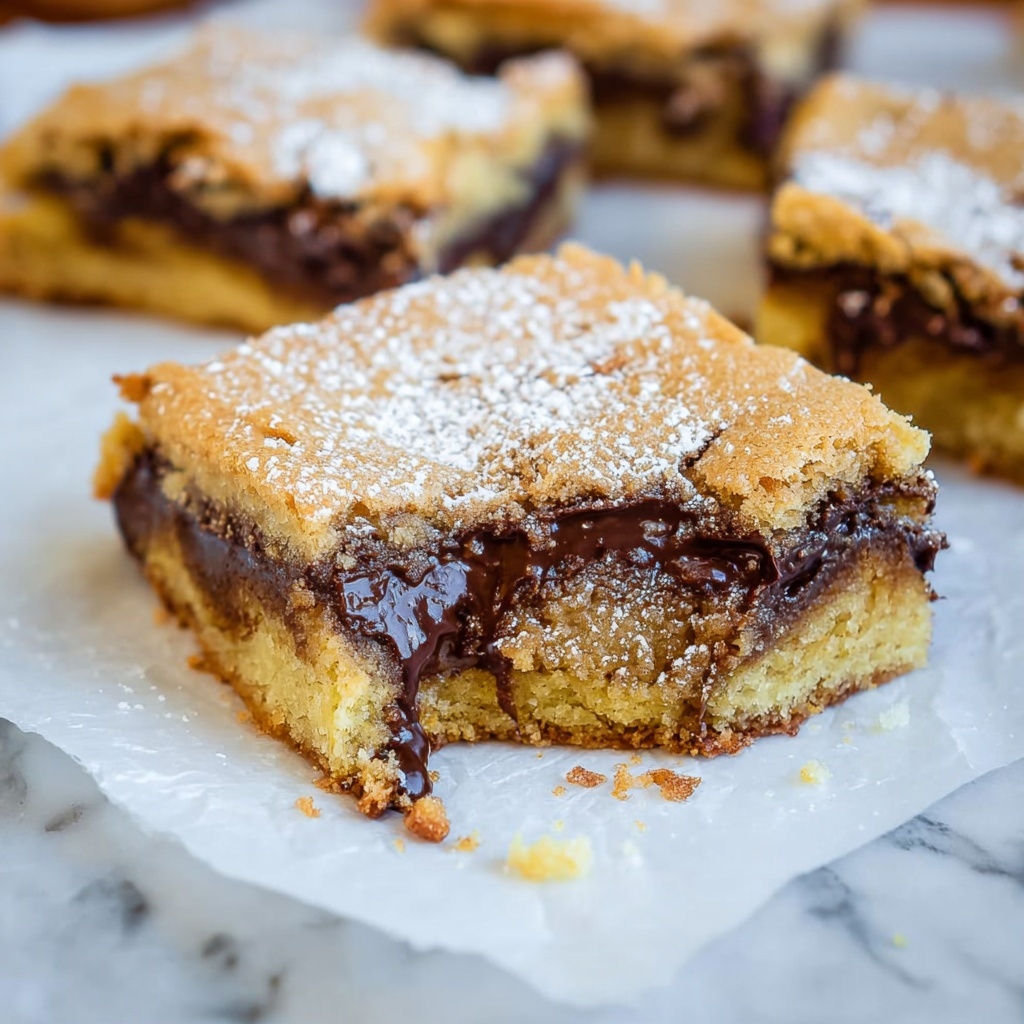
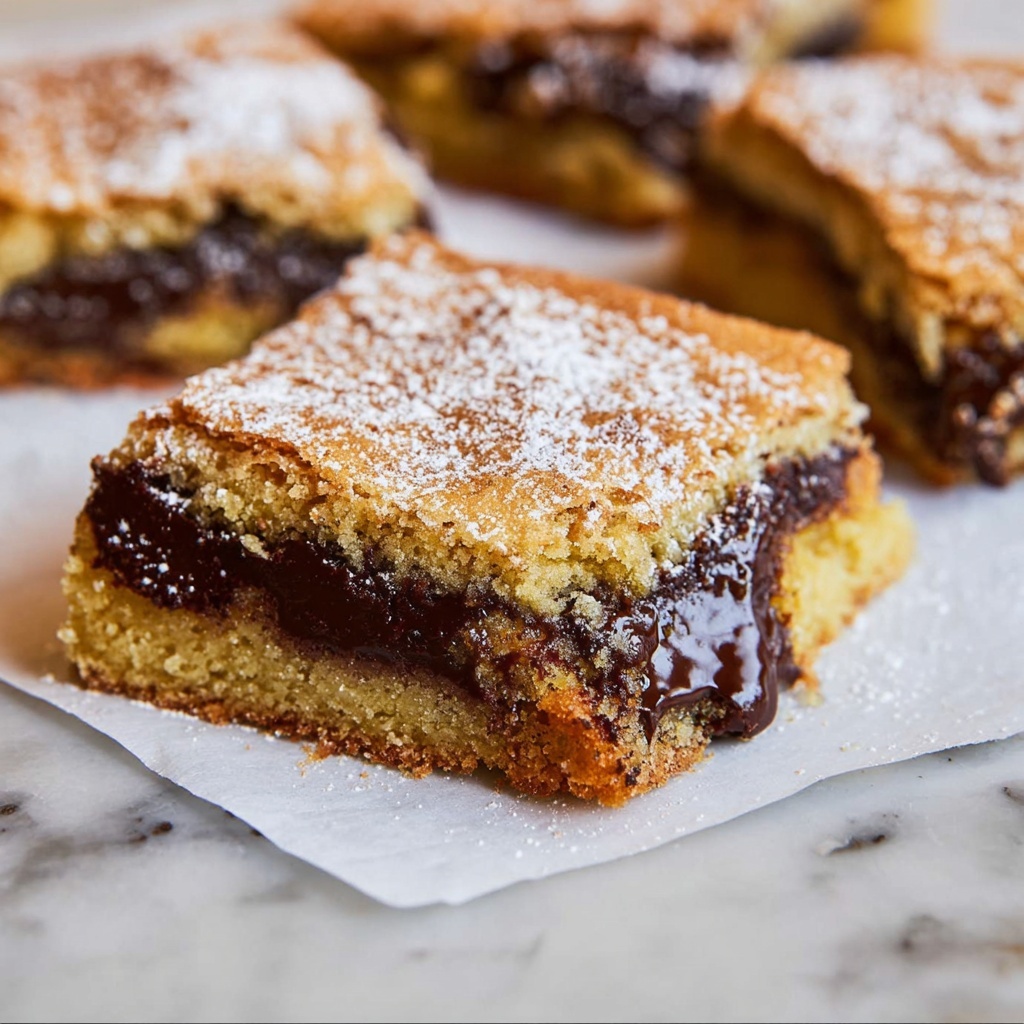
If you’re a fan of rich, creamy, and indulgent treats, then this Ganache-Stuffed Peanut Butter Bars Recipe will become your new obsession. Imagine buttery peanut butter bars with an irresistible, silky chocolate ganache surprise tucked right inside each bite. These bars are the perfect balance of sweet and salty, with a luscious texture that delights every sense. Whether you’re baking for a special occasion or just because, this recipe is guaranteed to bring smiles and satisfy chocolate-peanut butter cravings in the most spectacular way.

Ingredients You’ll Need
These ingredients are wonderfully straightforward but crucial for achieving the perfect flavor and texture that define the Ganache-Stuffed Peanut Butter Bars Recipe. Each one plays a special role, from the creamy peanut butter that gives richness to the soft yet sturdy base, to the silky ganache that adds a decadent chocolate surprise.
- 1/4 cup butter, melted: Provides a rich, buttery base for the bars and helps keep them moist.
- 1/2 cup brown sugar (+ 2 tablespoons): Adds a deep, caramel-like sweetness and moisture to the batter.
- 2 tablespoons white sugar: Also contributes sweetness and helps with the topping’s slight crunch.
- 1/2 cup creamy peanut butter: The hero ingredient that gives the bars their distinct nutty flavor and creamy texture.
- 1/2 teaspoon vanilla: Enhances all the flavors and adds a warm aromatic touch.
- 2 eggs: Bind everything together and provide structure to the bars.
- 2 tablespoons whole milk: Keeps the batter smooth and moist without weighing it down.
- 1 cup flour (spooned and leveled): Creates the perfect balance of softness and firmness.
- 1 teaspoon baking powder: Gives a gentle lift to the bars, preventing them from being too dense.
- 1/4 teaspoon salt: Balances the sweetness and highlights the peanut butter’s richness.
- 1-2 tablespoons white sugar (to top with): Adds a subtle sparkle and slight crunch on top.
- 1/2 cup cream: The key for making the decadent ganache filling.
- 3/4 cup semi-sweet chocolate chips: Melts into a smooth, glossy ganache that perfectly complements the peanut butter.
- Dash salt: Enhances the chocolate flavor in the ganache.
- 1 tablespoon butter: Adds extra silkiness and richness to the ganache filling.
How to Make Ganache-Stuffed Peanut Butter Bars Recipe
Step 1: Prepare the Ganache
First, let’s create that dreamy chocolate ganache that makes these bars unforgettable. Heat the cream in a microwave-safe bowl until it’s just bubbling at the edges—about 1 to 1.5 minutes on high. Then, add the chocolate chips and let them soften for about a minute. Slowly whisk the mixture until it turns into a smooth, shiny ganache. A pinch of salt and a tablespoon of butter make it ultra-rich and balanced. Pop it in the freezer so it cools and firms up, getting ready to become the luscious filling.
Step 2: Preheat and Prepare Your Pan
While the ganache chills, set your oven to 350 degrees Fahrenheit and grease or line your baking pan—either 9×9 or 8×8 inches will work perfectly. This ensures your bars will release easily and hold their shape beautifully.
Step 3: Mix the Wet Ingredients
In a mixing bowl, combine the melted butter with brown sugar and white sugar, stirring until they’re nicely blended. Then add the creamy peanut butter, vanilla, eggs, and milk. Give everything a good stir until the mixture feels smooth and inviting—this is where the magic of the peanut butter really shines.
Step 4: Combine the Dry Ingredients
In a separate bowl, whisk together the flour, baking powder, and salt. This dry mix ensures your bars get just the right lift and texture without overpowering the peanut butter’s rich flavor. Gently fold this into your wet mixture until just combined – don’t overmix, or the bars may become tough.
Step 5: Assemble the Bars
Spread half of the peanut butter batter evenly in your prepared pan. Now it’s time for the fun part: scoop out chunks of the chilled ganache—about one to three teaspoons each—and gently press them into the batter. Don’t worry if the ganache begins to melt and swirl into the batter a bit; it just creates those beautiful, marbled pockets of rich chocolate throughout. After embedding the ganache, cover it as best you can with the remaining batter.
Step 6: Add the Topping and Bake
Sprinkle 1 to 2 tablespoons of white sugar evenly over the top. This little touch adds a subtle crunch and sparkle after baking. Pop your pan into the oven and bake for about 28 to 29 minutes, or until the center is set and the top turns a gorgeous golden brown. Once baked, let the bars cool completely before slicing—this helps them firm up and keeps the ganache perfectly intact.
How to Serve Ganache-Stuffed Peanut Butter Bars Recipe
Garnishes
Feel free to get creative with toppings when you serve these bars. A light dusting of powdered sugar, a drizzle of melted chocolate, or even a sprinkle of crushed roasted peanuts add a lovely finishing touch. Fresh berries or a dollop of whipped cream also make for delightful complements to the rich flavors.
Side Dishes
These bars shine all on their own, but if you’re aiming for a balanced dessert platter, serve them alongside a scoop of vanilla ice cream or a refreshing berry compote. A cup of strong coffee or a glass of cold milk pairs beautifully to contrast the sweet richness.
Creative Ways to Present
Cut the bars into small bite-size squares for parties or stack them neatly on a dessert tray for an elegant touch. You can even layer them in dessert cups with whipped cream and chopped nuts to create a stunning parfait. Their rich ganache center makes them ideal for any celebration or casual day when you want to impress.
Make Ahead and Storage
Storing Leftovers
Once cooled completely, store your Ganache-Stuffed Peanut Butter Bars in an airtight container at room temperature for up to three days. If your kitchen is warm, it’s better to keep them in the fridge to maintain the ganache’s texture. Just make sure to bring them to room temperature before serving for the best experience.
Freezing
If you want to make these bars ahead of time or save leftovers for later, freezing works wonderfully. Wrap each bar tightly in plastic wrap and store them in a freezer-safe container or zip-top bag. They’ll keep well for up to three months. When ready, thaw them in the fridge overnight for a decadent treat any time.
Reheating
For that freshly-baked warmth, you can gently reheat a bar in the microwave for about 15 seconds. This softens the ganache slightly and makes the peanut butter base wonderfully tender. Just be careful not to overheat, or you might lose that perfect texture.
FAQs
Can I use natural peanut butter for this recipe?
Natural peanut butter can be used, but keep in mind it may change the texture a bit because it’s usually less creamy and can separate. For the best results, stick with creamy peanut butter to keep the bars soft and smooth.
Is it necessary to chill the ganache before adding it to the batter?
Absolutely! Chilling the ganache helps it firm up so you can easily scoop and stuff it into the batter without it melting too quickly. This step also creates those beautiful pockets of chocolate that make the bars special.
Can I substitute dark chocolate chips for semi-sweet in the ganache?
Definitely! Dark chocolate chips will give the ganache a slightly more intense, bittersweet flavor, which pairs fabulously with peanut butter. Just make sure to adjust sugar to taste if you go darker.
How do I know when the bars are done baking?
Look for a golden top and a center that’s set but still slightly soft. If you gently press the middle, it should spring back without leaving a dent. Be careful not to overbake, or the bars might dry out.
Can I make this recipe gluten-free?
Yes! Use your favorite gluten-free all-purpose flour blend in place of regular flour. Just ensure it includes a binding agent like xanthan gum for the best texture. The result will still be deliciously satisfying.
Final Thoughts
There is something truly special about this Ganache-Stuffed Peanut Butter Bars Recipe that makes it an instant favorite. The way the silky chocolate ganache harmonizes with the rich peanut butter base is pure bliss. I encourage you to dive in and make this recipe your own—share it with friends, savor it slowly, and enjoy every luscious bite. Once you try it, I bet it will become a staple in your baking repertoire too!