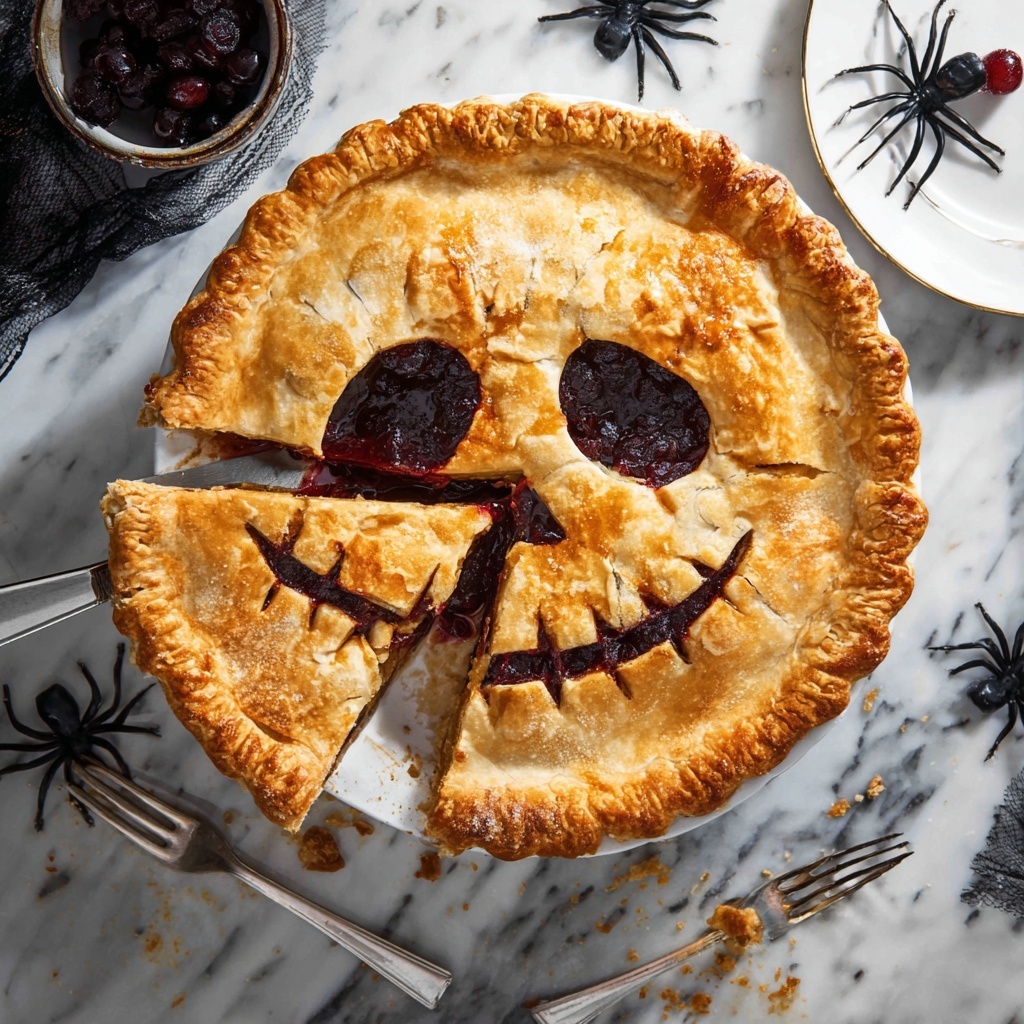
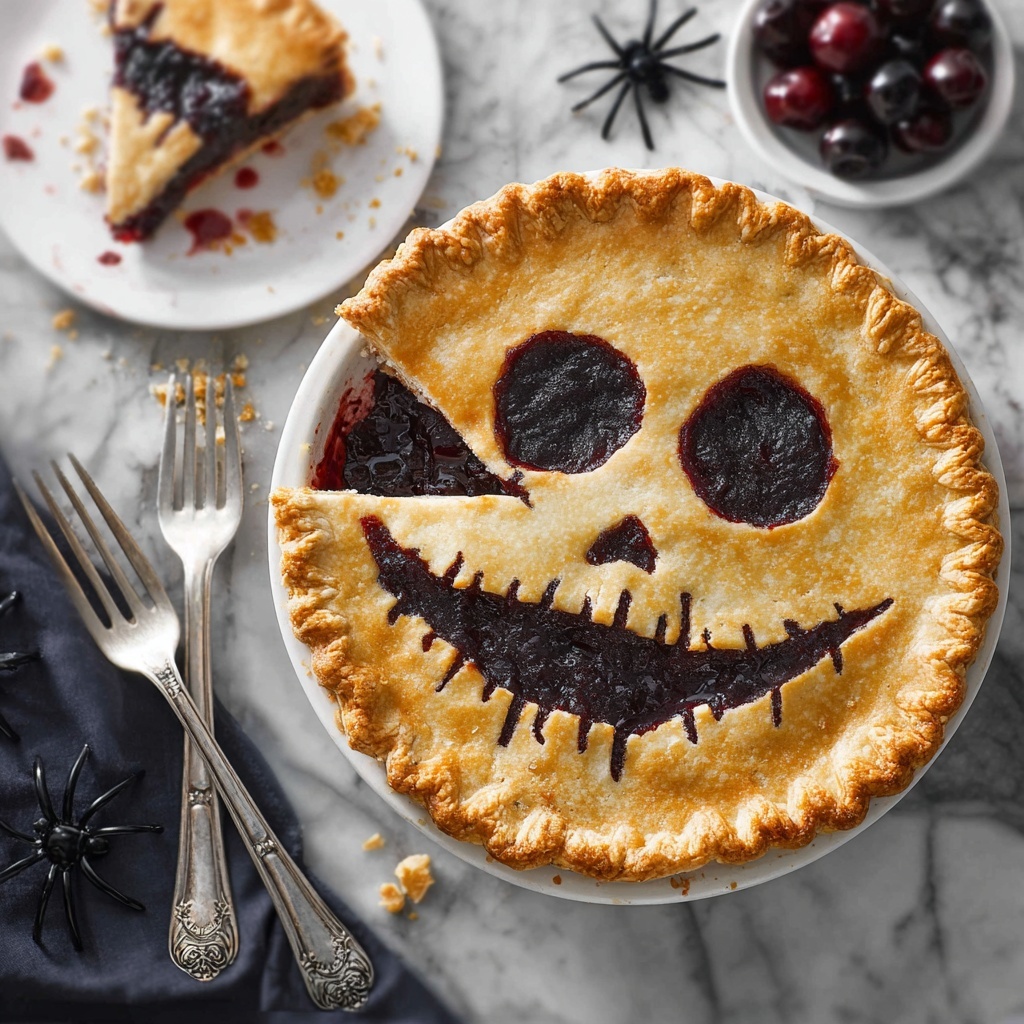
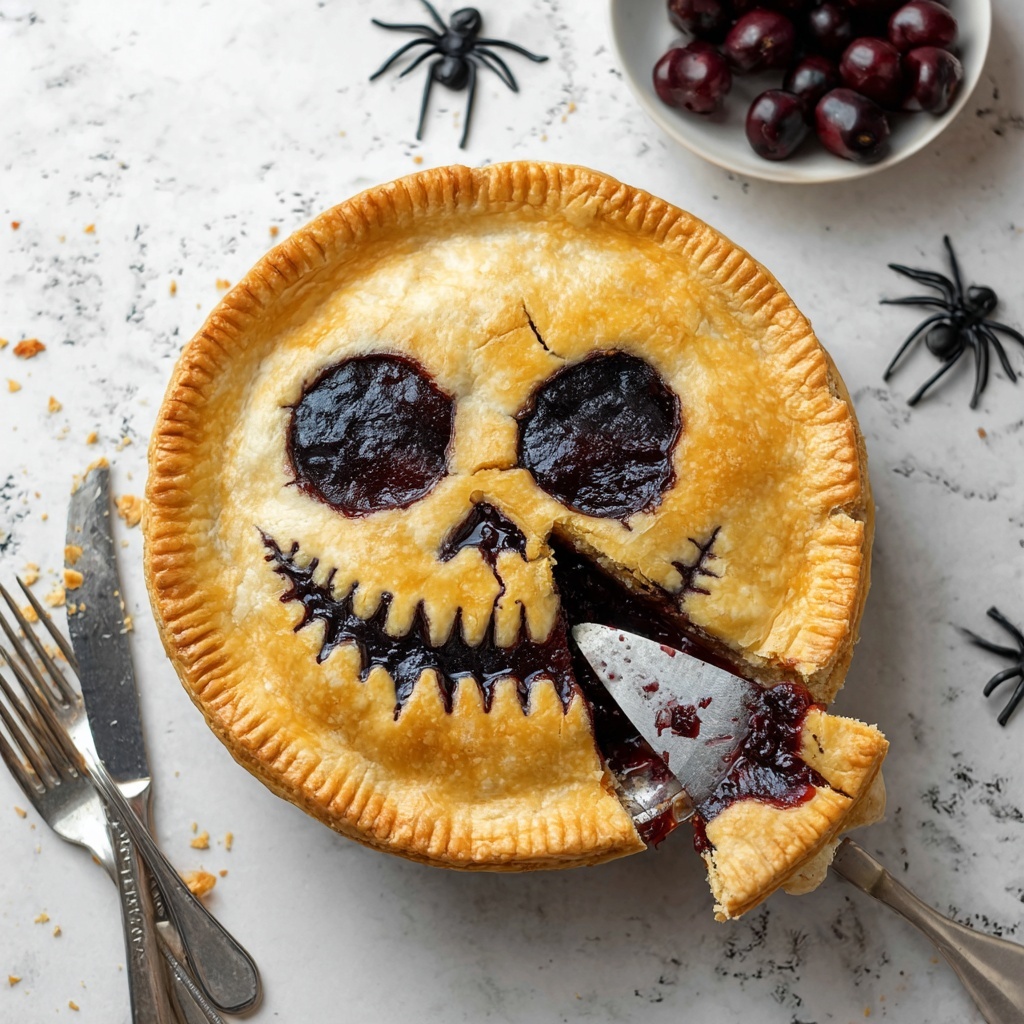
If you’re searching for a spooky yet irresistibly delicious dessert to delight friends and family this season, the Halloween Cherry Skull Pie Recipe has got you covered. This pie combines the deep, luscious flavor of dark cherries with a perfectly crisp, golden crust shaped like a haunting skull face that steals the show. It’s not just a pie, it’s a showstopper that’s both eerie and mouthwatering, guaranteed to become your favorite seasonal treat!
Ingredients You’ll Need
Getting the flavors just right starts with a handful of simple, high-quality ingredients. Each element plays a crucial role in building the perfect balance of sweet, tart, and spice that makes this pie unforgettable.
- 32 ounces frozen dark cherries: These provide a rich, tangy base that’s bursting with flavor once cooked down.
- 1 cup granulated sugar: Balances the tartness of cherries and helps create that luscious, sweet filling.
- 1/3 cup cornstarch: Essential for thickening the cherry filling to a perfect texture that won’t run.
- 1 squeeze fresh lemon juice: Adds brightness and helps cut through the sweetness for a fresh finish.
- 1 teaspoon ground cinnamon: Warms up the fruit filling with a comforting spice, elevating the overall flavor.
- 1 teaspoon finely ground sea salt: Subtly enhances all the flavors and balances the sugar.
- 2 sheets refrigerated pie dough: The flaky crust that forms your spooky skull canvas and seals all the goodness inside.
How to Make Halloween Cherry Skull Pie Recipe
Step 1: Prepare the Oven and Cherry Filling
Start by preheating your oven to 400 degrees Fahrenheit to get it ready for baking. Next, in a large saucepan, combine the frozen dark cherries, sugar, cornstarch, cinnamon, salt, and a squeeze of fresh lemon juice. Stir everything together so the cherries are fully coated, then place the pan over medium heat. Keep stirring frequently as the cherries thaw and the mixture thickens into a glossy, rich filling—not too runny but perfectly luscious. This step builds the intensely fruity and spiced heart of your Halloween Cherry Skull Pie Recipe.
Step 2: Cool and Prepare the Pie Crust
Once your cherry filling has thickened nicely, remove it from the heat to cool slightly—this prevents the crust from becoming soggy. Then take one sheet of your refrigerated pie dough and carefully roll it out into a 10-inch circle. Gently transfer this circle into your 8-inch pie dish. Don’t worry about the overhang; it’s part of the charm when you seal your pie later!
Step 3: Assemble the Filling and Skull Top Crust
Pour your thickened cherry filling directly into the pie crust, spreading it evenly for a beautiful, even layer. Now for the fun part! Roll out your second pie dough sheet to another 10-inch circle. Using a sharp knife, cut out two holes for eyes, two slits for the skull nose, and a crooked smile. This playful skull face will be the star of your Halloween Cherry Skull Pie Recipe, giving it personality and spookiness all in one.
Step 4: Seal and Bake Your Pie
Carefully place the skull face dough over the cherry filling, centering it perfectly. Press the edges of the top and bottom crusts together to slightly seal the pie, then firmly secure everything with a fork, making sure the edges won’t separate during baking. For an extra golden touch, brush the top crust with a simple egg wash made from one egg beaten with a tablespoon of milk, and sprinkle some Demerara sugar on top for a sparkly, crunchy finish. Place the pie on the middle oven rack and bake for 45 to 50 minutes until the crust turns a gorgeous golden brown and the filling bubbles enticingly underneath.
How to Serve Halloween Cherry Skull Pie Recipe
Garnishes
To amp up the spooky factor, serve each slice with a dollop of freshly whipped cream flecked with a pinch of ground cinnamon. A few fresh cherry halves on the side add a vibrant pop of color that ties in beautifully with the rich filling. If you want to go all out, a drizzle of dark chocolate sauce offers a decadent contrast and looks wickedly good!
Side Dishes
Pairing your Halloween Cherry Skull Pie Recipe with a scoop of creamy vanilla ice cream is a classic combo that can’t be beat. For a more adult twist, cinnamon-spiced whipped cream infused with a splash of bourbon or amaretto creates a wonderful flavor partnership. On the savory side, light cheese plates or roasted nuts make for excellent palate cleansers between bites.
Creative Ways to Present
Serve your pie on a rustic wooden board surrounded by autumn leaves and mini pumpkins for a festive presentation that brings fall charm to your table. For parties, place the pie on a stand and scatter edible candy bones or gummy spiders around it for a whimsical, creepy vibe. You can even use colored sugar sprinkles to highlight parts of the skull design on the crust to make it pop under candlelight!
Make Ahead and Storage
Storing Leftovers
Leftover Halloween Cherry Skull Pie Recipe? No worries! Wrap it tightly in plastic wrap or store it in an airtight container in the refrigerator. The flavors actually deepen after a day or two, making it just as delicious—if not more so—the next day.
Freezing
This pie freezes beautifully. Be sure to wrap it snugly in plastic wrap and then aluminum foil to protect it from freezer burn. It will stay fresh for up to two months. When you’re ready to indulge again, thaw it overnight in the fridge before reheating.
Reheating
To bring your Halloween Cherry Skull Pie Recipe back to life, reheat slices in a preheated 350-degree oven for about 10 to 15 minutes. This restores the crispness of the crust while warming the luscious filling just right. Avoid microwave reheating to keep that coveted flaky texture.
FAQs
Can I use fresh cherries instead of frozen?
Absolutely! Fresh cherries will work beautifully, especially when they’re in season. Just pit and chop them before mixing. Keep in mind the filling might be slightly looser initially, so you may need to adjust the cornstarch accordingly.
What if I don’t have refrigerated pie dough?
No problem! You can make your own pie crust from scratch or use puff pastry for a fluffier texture. The key is having enough dough to create the base and the skull top, so plan accordingly.
How do I make the skull face look neat?
Using a sharp knife or small cookie cutters helps achieve clean and precise cuts. You can also practice on parchment paper first to perfect your skull design before transferring it to the dough.
Can I make this pie vegan?
Yes! Substitute the egg wash with a mixture of plant-based milk and maple syrup or agave nectar for a nice glaze. Just ensure the pie dough is vegan or homemade using dairy-free ingredients.
How long can I keep the pie at room temperature?
Because of the fruit filling, it’s best to keep the pie refrigerated if not serving right away. At room temperature, it’s safest to enjoy within two hours to avoid any spoilage.
Final Thoughts
There’s something truly magical about the Halloween Cherry Skull Pie Recipe that brings festive fun and incredible flavor together in one unforgettable dish. Whether you’re serving it at a family gathering or a spooky party, this pie is sure to wow everyone with its dazzling presentation and rich cherry goodness. Don’t hesitate—grab your ingredients and get baking. The perfect Halloween dessert awaits, ready to become a cherished tradition!