
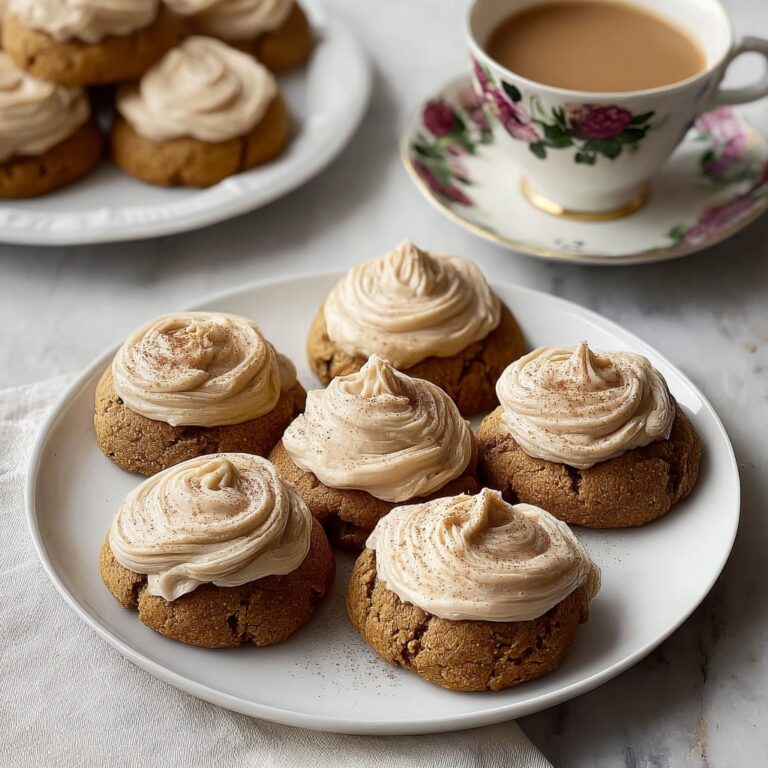
If you’ve ever wanted the perfect finishing touch for your sweet treats, let me introduce you to the ultimate Sugar Cookie Icing That Hardens Recipe. This icing is silky, vibrant, and dries to a lovely firm finish that’s ideal for decorating sugar cookies that look as fabulous as they taste. Whether you’re gearing up for holiday cookies or a fun weekend baking session, mastering this icing will elevate your baking game and make every cookie moment extra special.
Ingredients You’ll Need
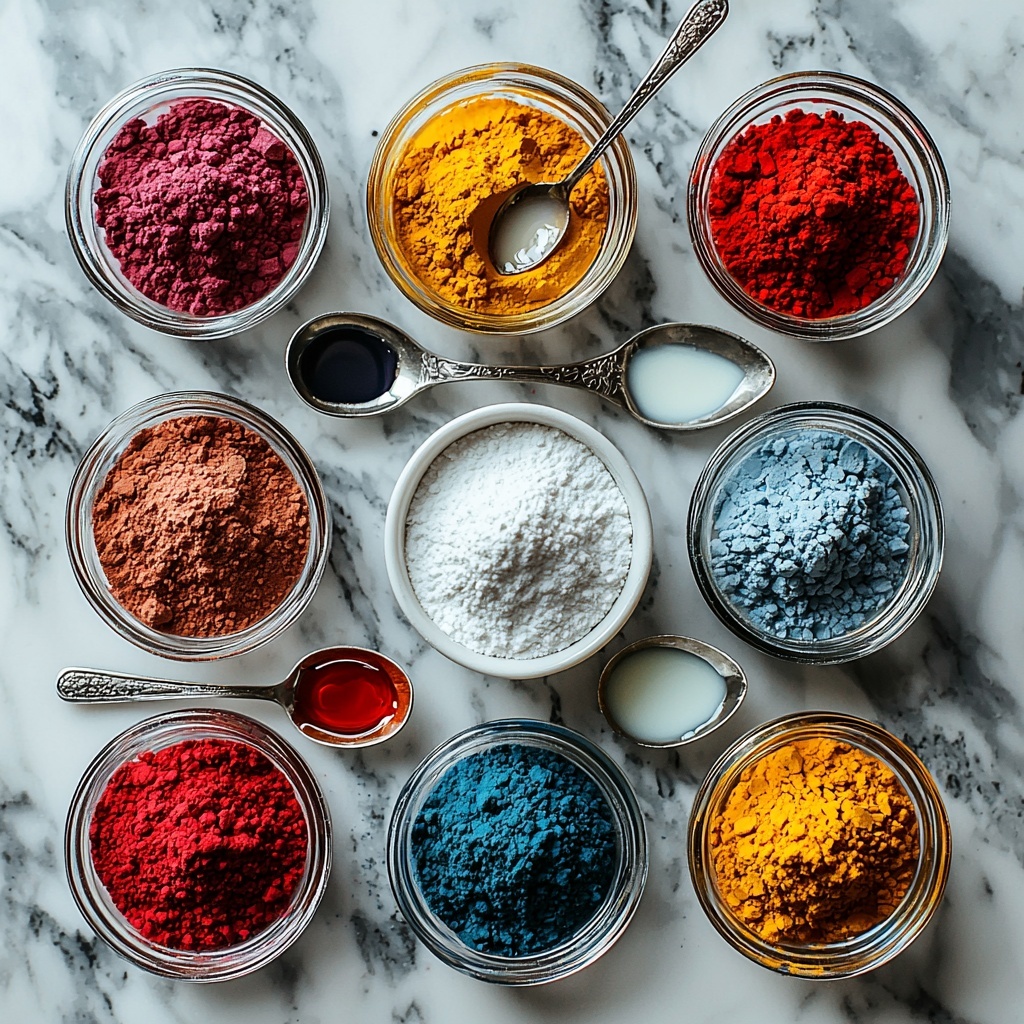
The magic of this Sugar Cookie Icing That Hardens Recipe lies in its simplicity—each ingredient has a straightforward role that brings the icing to life. From the creamy sweetness of powdered sugar to the smooth shine added by corn syrup, every component comes together to create the perfect texture and finish.
- 2 cups powdered sugar: The base that gives the icing its smooth, sweet texture and structure.
- 1 ½ tablespoons corn syrup: Adds a glossy finish and helps the icing harden nicely without cracking.
- ½ teaspoon vanilla extract: Infuses a warm, fragrant flavor that complements the cookie perfectly.
- 1 ½ tablespoons cold milk or water: Controls the consistency so your icing is easy to spread or pipe.
- Gel food coloring: Provides bold, vibrant hues with just a small amount, perfect for colorful decorations.
How to Make Sugar Cookie Icing That Hardens Recipe
Step 1: Sift and Prepare Your Powdered Sugar
Start by sifting the powdered sugar into a mixing bowl to remove any lumps. This step is crucial for that ultra-smooth consistency that lets your icing glide effortlessly onto cookies without clumps or graininess.
Step 2: Mix the Wet Ingredients
In the same bowl, add the corn syrup, vanilla extract, and cold milk or water. Stir these together gently at first, then more vigorously until smooth. This combination ensures your icing stays glossy, flavorful, and pliable.
Step 3: Adjust the Consistency
Now for the fun part. If the icing feels too thick for decorating, add a little more milk or water, just a quarter teaspoon at a time. If it’s too thin, sprinkle in a touch more powdered sugar. This balance is key because the right thickness lets your icing spread smoothly while still drying firm.
Step 4: Color Your Icing
Divide your icing into smaller bowls if you want multiple colors. Slowly mix in gel food coloring drop by drop until you reach your desired shades. Gel colors are perfect because they won’t thin out your icing like liquid colors can.
Step 5: Decorate and Let Dry
Now the real joy begins: decorate your fresh-baked sugar cookies with your beautifully colored icing. Once decorated, allow the cookies to set at room temperature—resist the urge to peek too soon! The icing will harden, creating that iconic crisp finish.
How to Serve Sugar Cookie Icing That Hardens Recipe
Garnishes
Bring even more sparkle to your decorated cookies by adding edible glitter, tiny sugar pearls, or sprinkles on top of the wet icing. These little extras adhere beautifully before the icing hardens, adding texture and visual flair that guests will adore.
Side Dishes
While sugar cookies are usually the star, pairing them with a warm cup of spiced tea or a frothy latte can elevate your tasting experience. The crisp icing and soft cookie with a comforting beverage are the perfect combination for any time of day.
Creative Ways to Present
Try stacking iced sugar cookies in clear jars as edible gifts, or arrange them on a colorful platter with seasonal fruit for a festive table centerpiece. You can even pipe custom messages or designs on your icing to personalize every batch for birthdays, holidays, or any celebration.
Make Ahead and Storage
Storing Leftovers
If you have leftover icing, store it in an airtight container to keep it from drying out. Before using it again, stir well and adjust the consistency with a few drops of milk or water as needed. For decorated cookies, keep them covered at room temperature to maintain their crisp icing finish.
Freezing
While the icing itself isn’t ideal for freezing, sugar cookies decorated with this icing can be frozen after the icing has completely dried. Place cookies in a single layer on a baking sheet to freeze initially, then transfer to a sealed container or bag to preserve freshness without sacrificing icing texture.
Reheating
Generally, reheating isn’t needed with this icing recipe. If your cookies have been refrigerated or are slightly firm, allow them to come to room temperature before serving to enjoy that perfect balance of crisp icing and tender cookie.
FAQs
Can I substitute corn syrup with something else?
Yes! While corn syrup gives the best shine and hardness, you can use light honey or golden syrup as alternatives, but the finish might be slightly less glossy and firm.
How long does it take for the icing to harden?
Typically, the icing will dry to a hard finish within 4 to 6 hours at room temperature, but overnight is best for full setting and durability.
Can I use this icing for cakes or other desserts?
This icing is primarily designed for sugar cookies because it hardens well, but it can also add a fun decoration for cupcakes or gingerbread, where a crisp edge is desired.
What’s the best way to store iced cookies to keep icing from becoming sticky?
Store iced cookies in an airtight container with a layer of parchment paper between them at room temperature. Avoid refrigeration to prevent moisture from making the icing sticky.
What if my icing cracks after hardening?
Cracking usually means the icing was spread too thick or dried too quickly. Next time, try thinner layers and keep cookies in a moderate environment away from direct heat or drafts while drying.
Final Thoughts
Try this Sugar Cookie Icing That Hardens Recipe soon and watch your cookies transform into little masterpieces with that perfect glossy, firm finish. It’s simple, reliable, and turns every batch into a celebration of color and taste. Happy decorating!
Print
Sugar Cookie Icing That Hardens Recipe
- Prep Time: 5 minutes
- Cook Time: 0 minutes
- Total Time: 5 minutes
- Yield: Enough icing to decorate approximately 12 standard sugar cookies
- Category: Dessert
- Method: No-Cook
- Cuisine: American
Description
This easy sugar cookie icing recipe creates a smooth, hardening glaze perfect for decorating your favorite cookies. Made with powdered sugar, corn syrup, vanilla, and milk or water, this icing dries to a firm finish, ideal for intricate designs and festive treats.
Ingredients
Ingredients
- 2 cups powdered sugar
- 1 ½ tbsp corn syrup
- ½ tsp vanilla extract
- 1 ½ tbsp cold milk or water
- Gel food coloring, as needed
Instructions
- Sift the powdered sugar: Sift 2 cups of powdered sugar into a mixing bowl to ensure there are no lumps, which helps achieve a smooth icing texture.
- Mix wet ingredients: Add 1 ½ tablespoons corn syrup, ½ teaspoon vanilla extract, and 1 ½ tablespoons of cold milk or water to the powdered sugar. Stir until the mixture becomes smooth and well combined.
- Adjust consistency: To get the perfect icing thickness, add more milk or water little by little if the icing is too thick. The ideal consistency should be thick enough to hold shape but spreadable.
- Color the icing: Divide the icing into smaller bowls according to how many colors you need. Add gel food coloring to each bowl and mix until the color is evenly distributed.
- Decorate cookies: Use the colored icing to decorate your cookies. Let the icing set at room temperature for several hours until it hardens completely before storing or stacking the cookies.
Notes
- Use gel food coloring instead of liquid to avoid thinning the icing.
- If icing is too runny, add more powdered sugar a tablespoon at a time to thicken it.
- Store leftover icing covered with plastic wrap to prevent drying out.
- Allow cookies to dry completely at room temperature; refrigeration may cause the icing to sweat.
- This icing works great for detailed piping or flooding sugar cookies.


